757-384-0411 sales@neptuneclean.com
#1 Reason Why You Should Start a Pressure Washing Business

#1 Reason Why You Should Start a Pressure Washing Business

Why You Should Start a Pressure Washing Business

This article is for anyone who’s ever thought about how to start a pressure washing business.

While pressure washing is a commonly-used term that most people recognize, it’s often difficult to find someone to wash your car, boat or house when you need it done. Soft-washing is another common-used term used mostly among pressure washing professionals. Homeowners are becoming more familiar with it, however.

Basically, it’s applying a detergent at a low pressure to eliminate the risk of damaging to a home using high pressure. The cleaning agents do all the work removing the environmental contaminants.

If you have the skills to pressure wash residential or commercial properties and are looking for ways to earn extra income, starting your own pressure washing business could be the right move for you. Even if you lack the skills, it’s very easy to learn. Before you do so, however, it’s important to consider the following three things before you start a pressure washing business.

3 reasons why you should start a pressure washing Business

1) Demand for pressure washing services is growing 2) It’s easy to set up a business these days and startup costs are relatively low 3) The market is wide open for competition. Let’s take a deeper dive into each one.

#1: Demand for pressure washing services is growing with so many homes and businesses needing their sidewalks, roofs, driveway, walls and more cleaned off, there are opportunities abound.

#2: While you may need some special training to get started the invest in high-quality equipment can be as low as a $2000 to $3000. This is considering you already have your own truck. You can start on a shoestring or go all-in and build a extremely capable pressure washing rig.

#3: Competition is a good thing! That means there’s a market for pressure washing services. Your goal is to over-deliver on your value proposition to make the competition a non-factor. If you do that, the competition will be asking themselves “what happened to all my customers?”.

Start a Pressure Washing Business

How to start pressure washing

What do you need to start a pressure washing business? To access the easy button, click this link to access my course on “How to Start Pressure Washing Business“.

The first step to starting any new business is to figure out if it’s something you would like to do and more importantly, is it profitable. If you don’t have pressure washing experience, there are plenty of books, YouTube videos and websites that will teach you how. The SBA has plenty of resources that will walk you through the steps of planning, launching, and running a pressure washing business.

Do i need a license to start a pressure washing business?

Many people think you need a contractors license to start this type of business but I’ve found that it’s not necessary in most cases. You’ll have to check your individual state to make sure but in Virginia there is no requirement.

The best time to start pressure washing is now

While the pressure washing industry is not (yet) as saturated with competitors as some other industries, it’s still growing. According to one source, the global pressure washer market size was estimated at USD 1.88 billion in 2019 and is expected to reach USD 1.95 billion in 2020. Another perk?

Where can I find customers for my pressure washer business?

To start a pressure washing business you’ll need to do some research to make sure you’re targeting the right customer segment. Where you find your customers will depend upon which business model you decide to start. Conducting primary and secondary research will identify customer segments and help you decide what type of business model to start.

Do you want to focus on the residential exterior home cleaning market or the automotive cleaning / detailing market? Do you want to do commercial work or strictly residential? Each of these is a separate market segment with different needs, wants and profitability.

Where can I find used pressure washers?

If you’re looking to start a pressure washing business, but don’t want to spend a lot of money, then buying used pressure washers is an option. There is more risk with purchasing used equipment, but you can get some good deals if you’re careful. I suggest implementing a strategy to immediately re-invest your earnings into bigger and better equipment.

This shoestring startup strategy is a viable one and through disciplined pre-planned action, is a great one. Check your local pressure washing store for used gear, Craigslist, Offerup, or other auction sites for great deals.

What type of detergents should I use in my pressure washer?

The most common cleaner used in the exterior residential and commercial building markets is Sodium Hypochlorite (SH). The chemicals you choose to use in your pressure washer depend on what kind of cleaning job you’re doing.

If you’re cleaning concrete, make sure to use detergents specifically designed for these surfaces but also the kind of stain you’re trying to remove. If your cleaning job involves soil or other organic or environmental material, you still must consider what you’re cleaning as well as the type of stain.

Gutter guard installation

What equipment will I need start a pressure washing business?

Starting a pressure washing business doesn’t require an enormous outlay of cash, but you will need to purchase some equipment—the total cost is dependent on a few considerations. First, you need to think about the business model you’d like to start.

Will you serve the residential market, commercial or both? Will you offer additional services like roof cleaning or window cleaning? There’s many more considerations but these examples require different equipment and therefore, more capital.

How do I get my customers?

Getting customers for your pressure washing business can be tough—especially if you don’t have any money to spend on advertising or building awareness. So, how do you get customers? Here are three great ways to drum up business for your pressure washing company: Attend networking events.

If you meet someone who needs pressure washing done, ask if they know anyone else who might need it done. Go old school and drive through neighborhoods looking for homes that need cleaning. You can leave a doorhanger with a quote on it to clean the home. Better yet, knock on the door and hand them the quote. You might just get the business on the spot.

What if it rains?

Light rain never hurt anyone, so I’ll put on a light raincoat and keep working. If the rain becomes too heavy it will rinse the soap off prematurely so you may have to wait for the rain to lighten up a bit. Pressure washing near me is a season business so we like to take advantage of the time we have and service as many customers as we can.

Can I make money at this?

The great thing about a pressure washing business is that you can choose different business models. I like to think there’s riches in niches so plant your stake in the ground and specialize in the automotive detailing area, restaurant hood vent cleaning, or even window washing.

There are plenty of people out there who make money washing cars, windows, and homes, but can you? As with any business, you’ll need to assess whether it’s a viable option for you. Consider these factors when determining if starting up your own pressure washing business is worth it. I will tell you that I would not be doing this if it was not profitable. That’s what you go into business for in the first place.

How much will it cost me to get started?

How much money you will need depends upon your business model and what equipment you already have. Do you have a truck and a trailer? You’ll need transportation to get you to where your customers are. The customer segment you intend to serve as defined in your business model will dictate the equipment you need and therefor the price.

I would plan to spend anywhere from $1000 to $5000 and more depending upon your resources. A market research study will help you in determining how much money you will need. To start a pressure washing business you can also begin providing services on the weekends until you build up a reputation and enough business to go full-time. If you’ve decided to start a pressure washing business see the Small Business Administration Startup Guide.

Click here if you’d like a quote on pressure washing services

Titan Hose Reel Install

Titan Hose Reel Install

DIY Titan Hose Reel Install

I began this Titan hose reel install journey about 2 months ago when I started looking for the reels. Originally I wanted two 18” Titan hose reels but they were next to impossible to find due to the global supply chain disruption that is happening in 2021. Since I wanted electric, stainless-steel reels, my choices were limited to a couple top brands and Titan was my first choice.

 I researched several different brands and all of them were backordered. I would imagine that it is the raw materials that’s holding up everything. The price of metal has skyrocketed due to this global, COVID induced, supply chain issue. The manufacturers just can’t get the raw materials they need to produce the products they sell.

 After some thought, I decided there are probably not many people looking for the larger size Titan hose reels. To my surprise I was correct. I found two, 22-inch Titan hose reels and quickly purchased them. I’m still waiting for the Titan stack kit to complete the Titan hose reel install and hopefully it will arrive the beginning of 2022. Once I complete the Titan hose reel install I’ll still be waiting on the chemical hose that is also on backorder.

Titan Hose Reel Install with Guide and Stack Kit

Titan hose reel for soft wash system

To begin the Titan hose reel install, I had to remove the NorthStar hose reel that holds my 4gpm pressure washer hose. Since I’m planning on running with two crews this summer, this hose reel and the 4gpm pressure washer will be relocated back to the small trailer I started with.

 The process for the Titan hose reel install was simple. Mount the hose reel to the deck of my flatbed, run a battery wire to the hose reel and that’s about it.

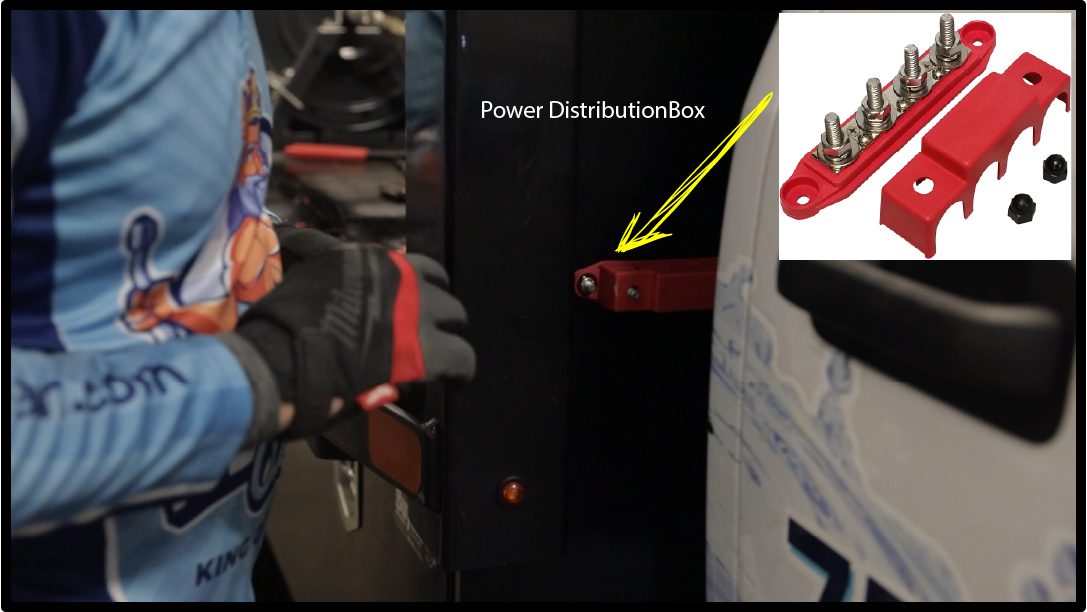
 My first task was to install a power distribution block (PDB) on the truck’s flatbed and run a wire from the battery to the PDB. The PDB has 4 studs that allow you to add other 12v devices such as a transfer pump for pumping SH into my holding tank.

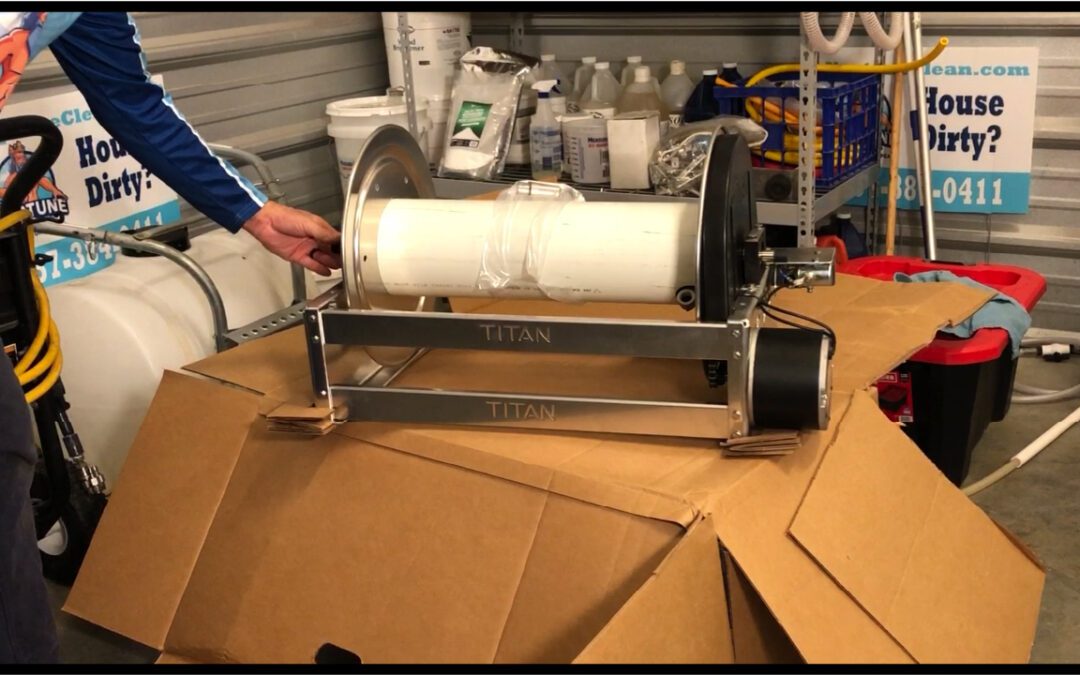
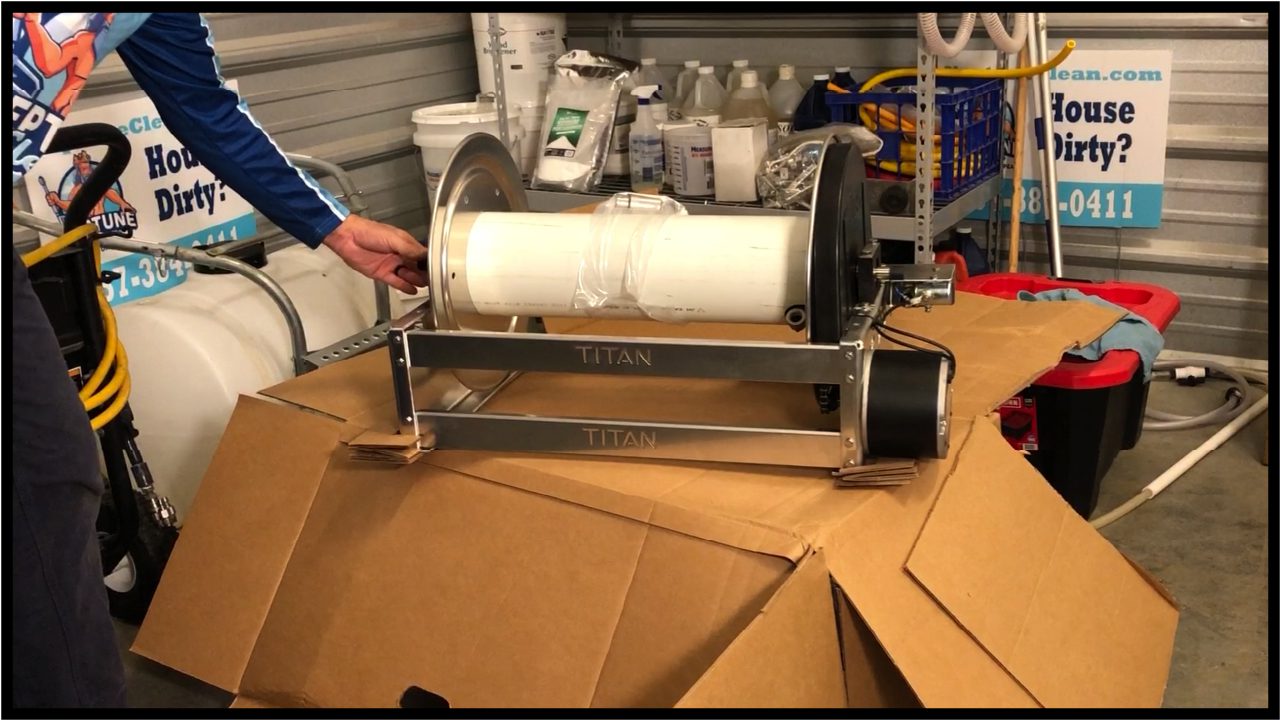
New Titan hose reel unboxed

I mounted the PDB to the vertical flatbed wall that protects the truck cab in a place that we semi-protected to minimize the chances of something coming into contact and shorting it out.

 Next, we ran a wire from the battery to the PDB to provide the necessary power. The Titan hose reel install required 6-gauge wire, so we had to crimp on the correct size eyelets and put some heat-shrink tube over the connection to protect it from the elements. The wire from the battery to the PDB was customer made and so was the wire from the PDB to the Titan hose reel.

New Titan hose reel unboxed

The hot wire from the PDB is connected to the Titan hose reel solenoid which sends the power to the motor when the button is pushed. This is a simple hookup once you know which side of the solenoid gets the hot wire.

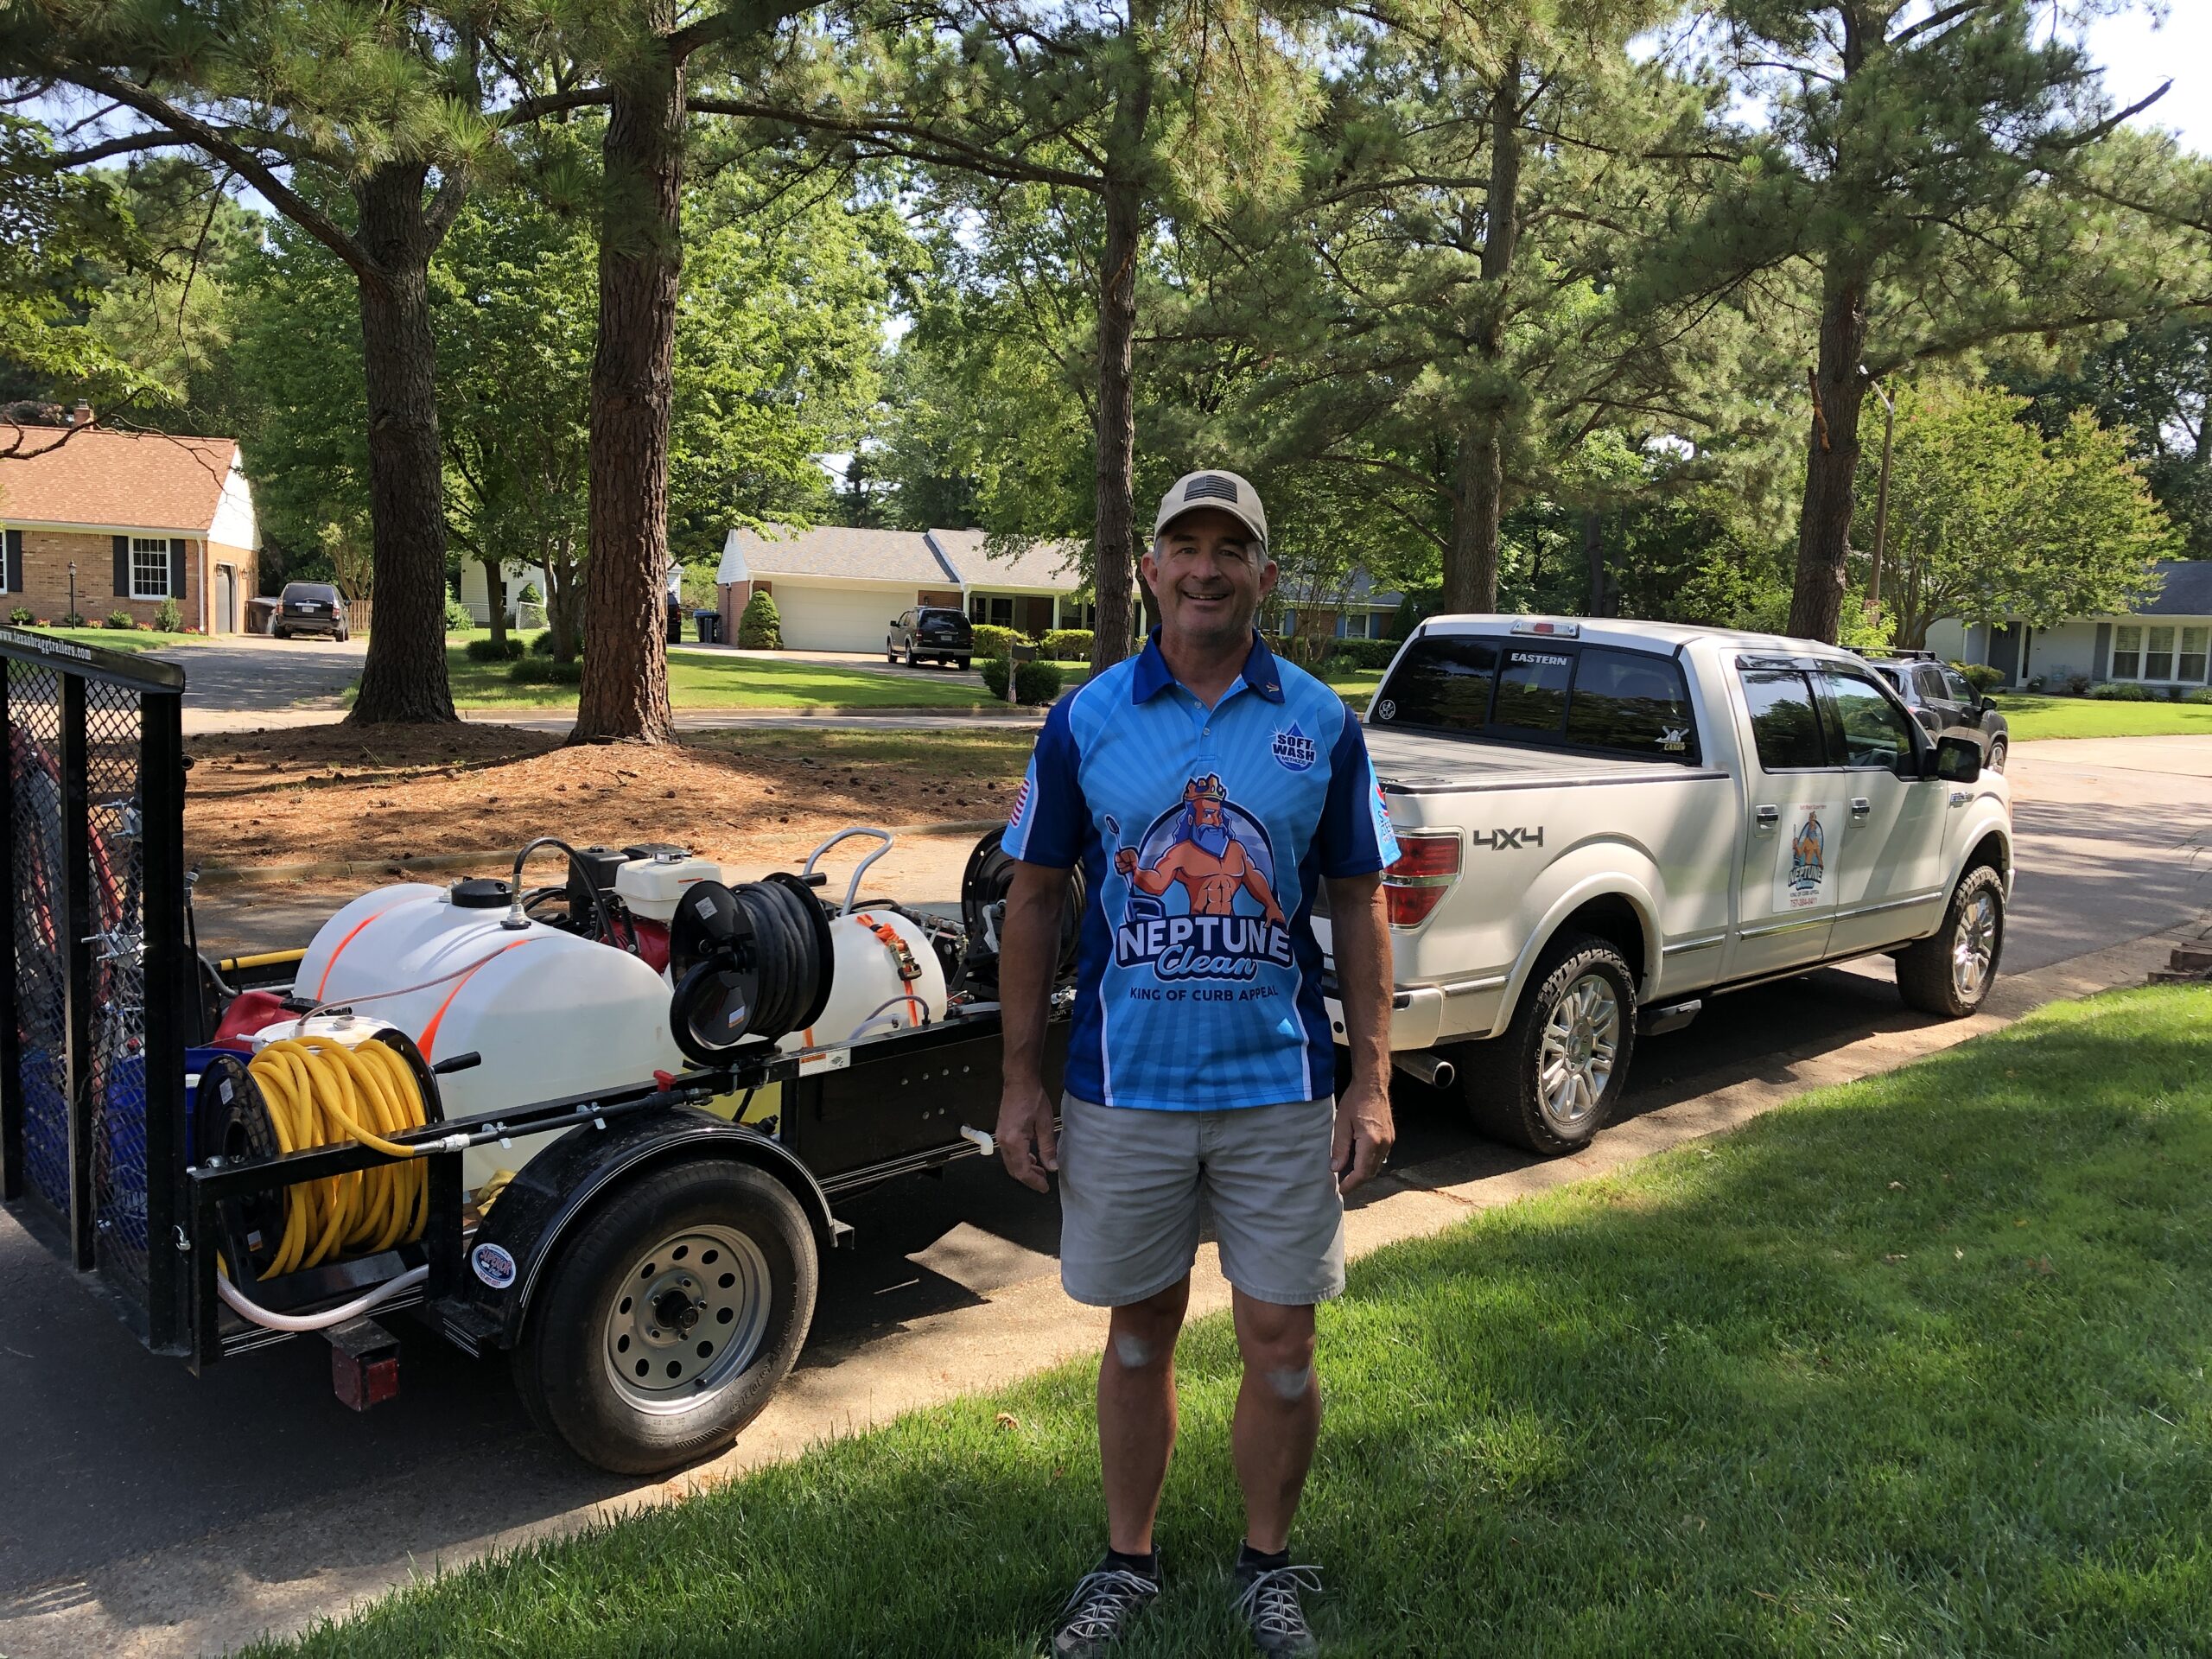
Once the reels are secured to the flatbed deck using stainless steel bolts, washers and locknuts, the wire can be connected safely. That about all there is to the Titan hose reel install. Next, I had to remove the old 4gpm pressure washer and get it ready to install on my little 4’x8’ trailer. That little one-man setup can produce $600 per day easily so I’d be a fool to not get that up and running for the 2022 season.

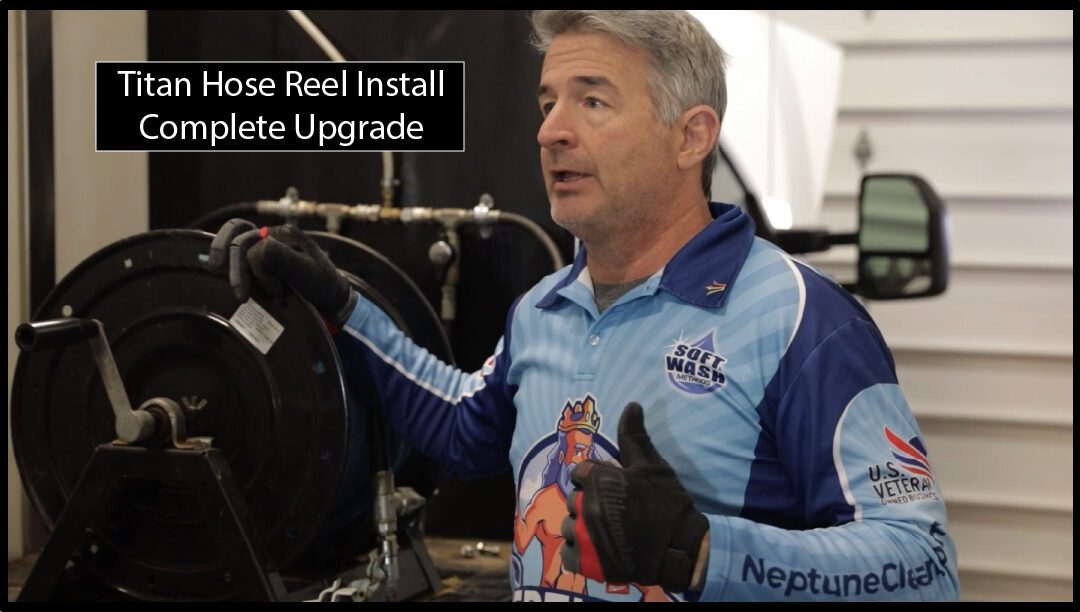
Be sure to check out the video of the entire process embedded at the top of this page. It’s a little long but worth the watch. Also, be sure to check out my DIY Downstream Injector Box Build.

Click this link to check out my other Pressure Washing Business posts. Click this link or more information on Titan Products

Titan Hose Reel Unboxing and Guide Installation

Titan Hose Reel Unboxing and Guide Installation

Titan Hose Reel Unboxing and Guide Installation

Bill Seith here with Neptune clean. I wanted to take the time to share something exciting news. Well, it’s exciting for me anyway. In the age of COVID supply chain struggles, I finally found a couple of Titan Hose Reels. I’ve been looking for some Titan Hose Reels for quite some time now with no luck. The COVID induced supply chain issues have made finding them a chore.

I had been looking for 18” Titan Hose Reels with no luck. Most suppliers will take your money and tell you it could be 6 months before you see them. I don’t know about you but I don’t want to tie up my working capital for that long.

So, you know what? I began to think of alternatives. Why can’t I use 22-inch reels?  I’m upgrading my soft wash system and I want to put 300 feet of chemical hose so why not. After researching what it will hold, a 22-inch Titan Hose Reel is a perfect fit.

My thought process is that most pressure washing companies are looking for the smaller 18” model so I thought I’d call around for the larger one. Well, my persistence paid off and I found a couple of them at SprayerDepot.

I thought I’d share my excitement with a videotaped unboxing of the 22-inch Titan hose reel and hose reel guide. Since its winter here in Virginia Beach, Virginia I might as well install the hose reel guide and get them ready to be installed on the rig.

Titan Hose Reel with Guide and Stack Kit

Titan hose reel for soft wash system

I’m also upgrading the soft wash system to a 11gpm 300psi gas powered soft wash pump. I’m taking off the Doug Rucker special, which has served me well. It’s been a decent setup but I’m ready for the next level. The current soft wash system uses an air diaphragm pump, FlowJet pump with a small compressor from northern tool.

Since my goal is $55,000 a month in revenue this coming season, I’m going to throw the smaller soft wash system and my 4gpm pressure washer on a trailer and run with two rigs this summer.

So, these new hose reels are going to be great when combined with the more powerful gas soft wash pump. The 22-inch Titan Hose Reel can easily hold 300 feet of 5/8th inch chemical hose. That is more than we’ve ever needed to date so I think we’re covered for future jobs.

This all-new setup with its 300 psi at 11gpm pump, is going to be a soft washing beast.

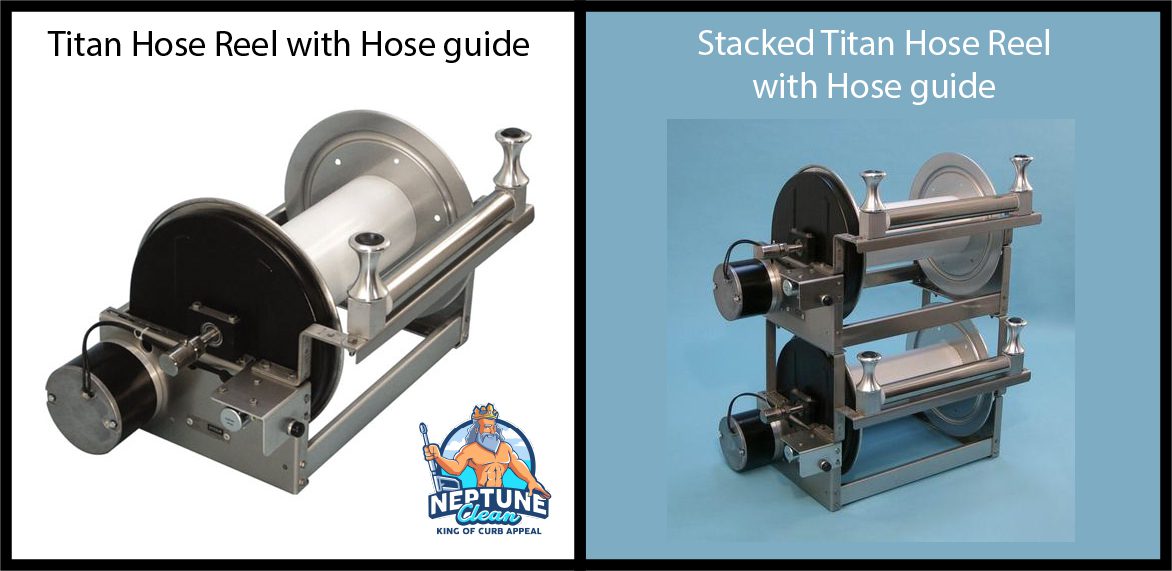
Getting back to installing the new Titan Hose Reel Guides. This is an easy install. There are two brackets that are bolted onto the hose reel and then the Titan Hose Reel Guide is bolted to the bracket

Purchasing the Titan Hose Reel Guides for my new reels was a bit of an ordeal. The first company I tried to purchase them from ended up not having them, so I went back to SprayerDepot.com and found the two I needed. I’m still waiting for a Titan Hose Reel Stack Kit so I can get the two reels stacked and mounted on the new F450 flat bed.

One thing I did want to show you though, are the differences in the mounting brackets. One side is longer and has a different bolt pattern than the other. It’s easy to figure it out, just match the bolt pattern up to the holes on the Titan Hose Reel and then you’re ready to go.

 You’ll have to remove the two top bolts from where the push button switch is to install the left side bracket. Once you get both brackets installed, you’re ready to bolt on the Titan Hose Reel guides.

Click this link to check out my other Pressure Washing Business posts.

New Titan hose reel unboxed
Gutter Cleaning in Virginia Beach

Gutter Cleaning in Virginia Beach

gutter cleaning in virginia beach

Gutter Cleaning in Virginia Beach

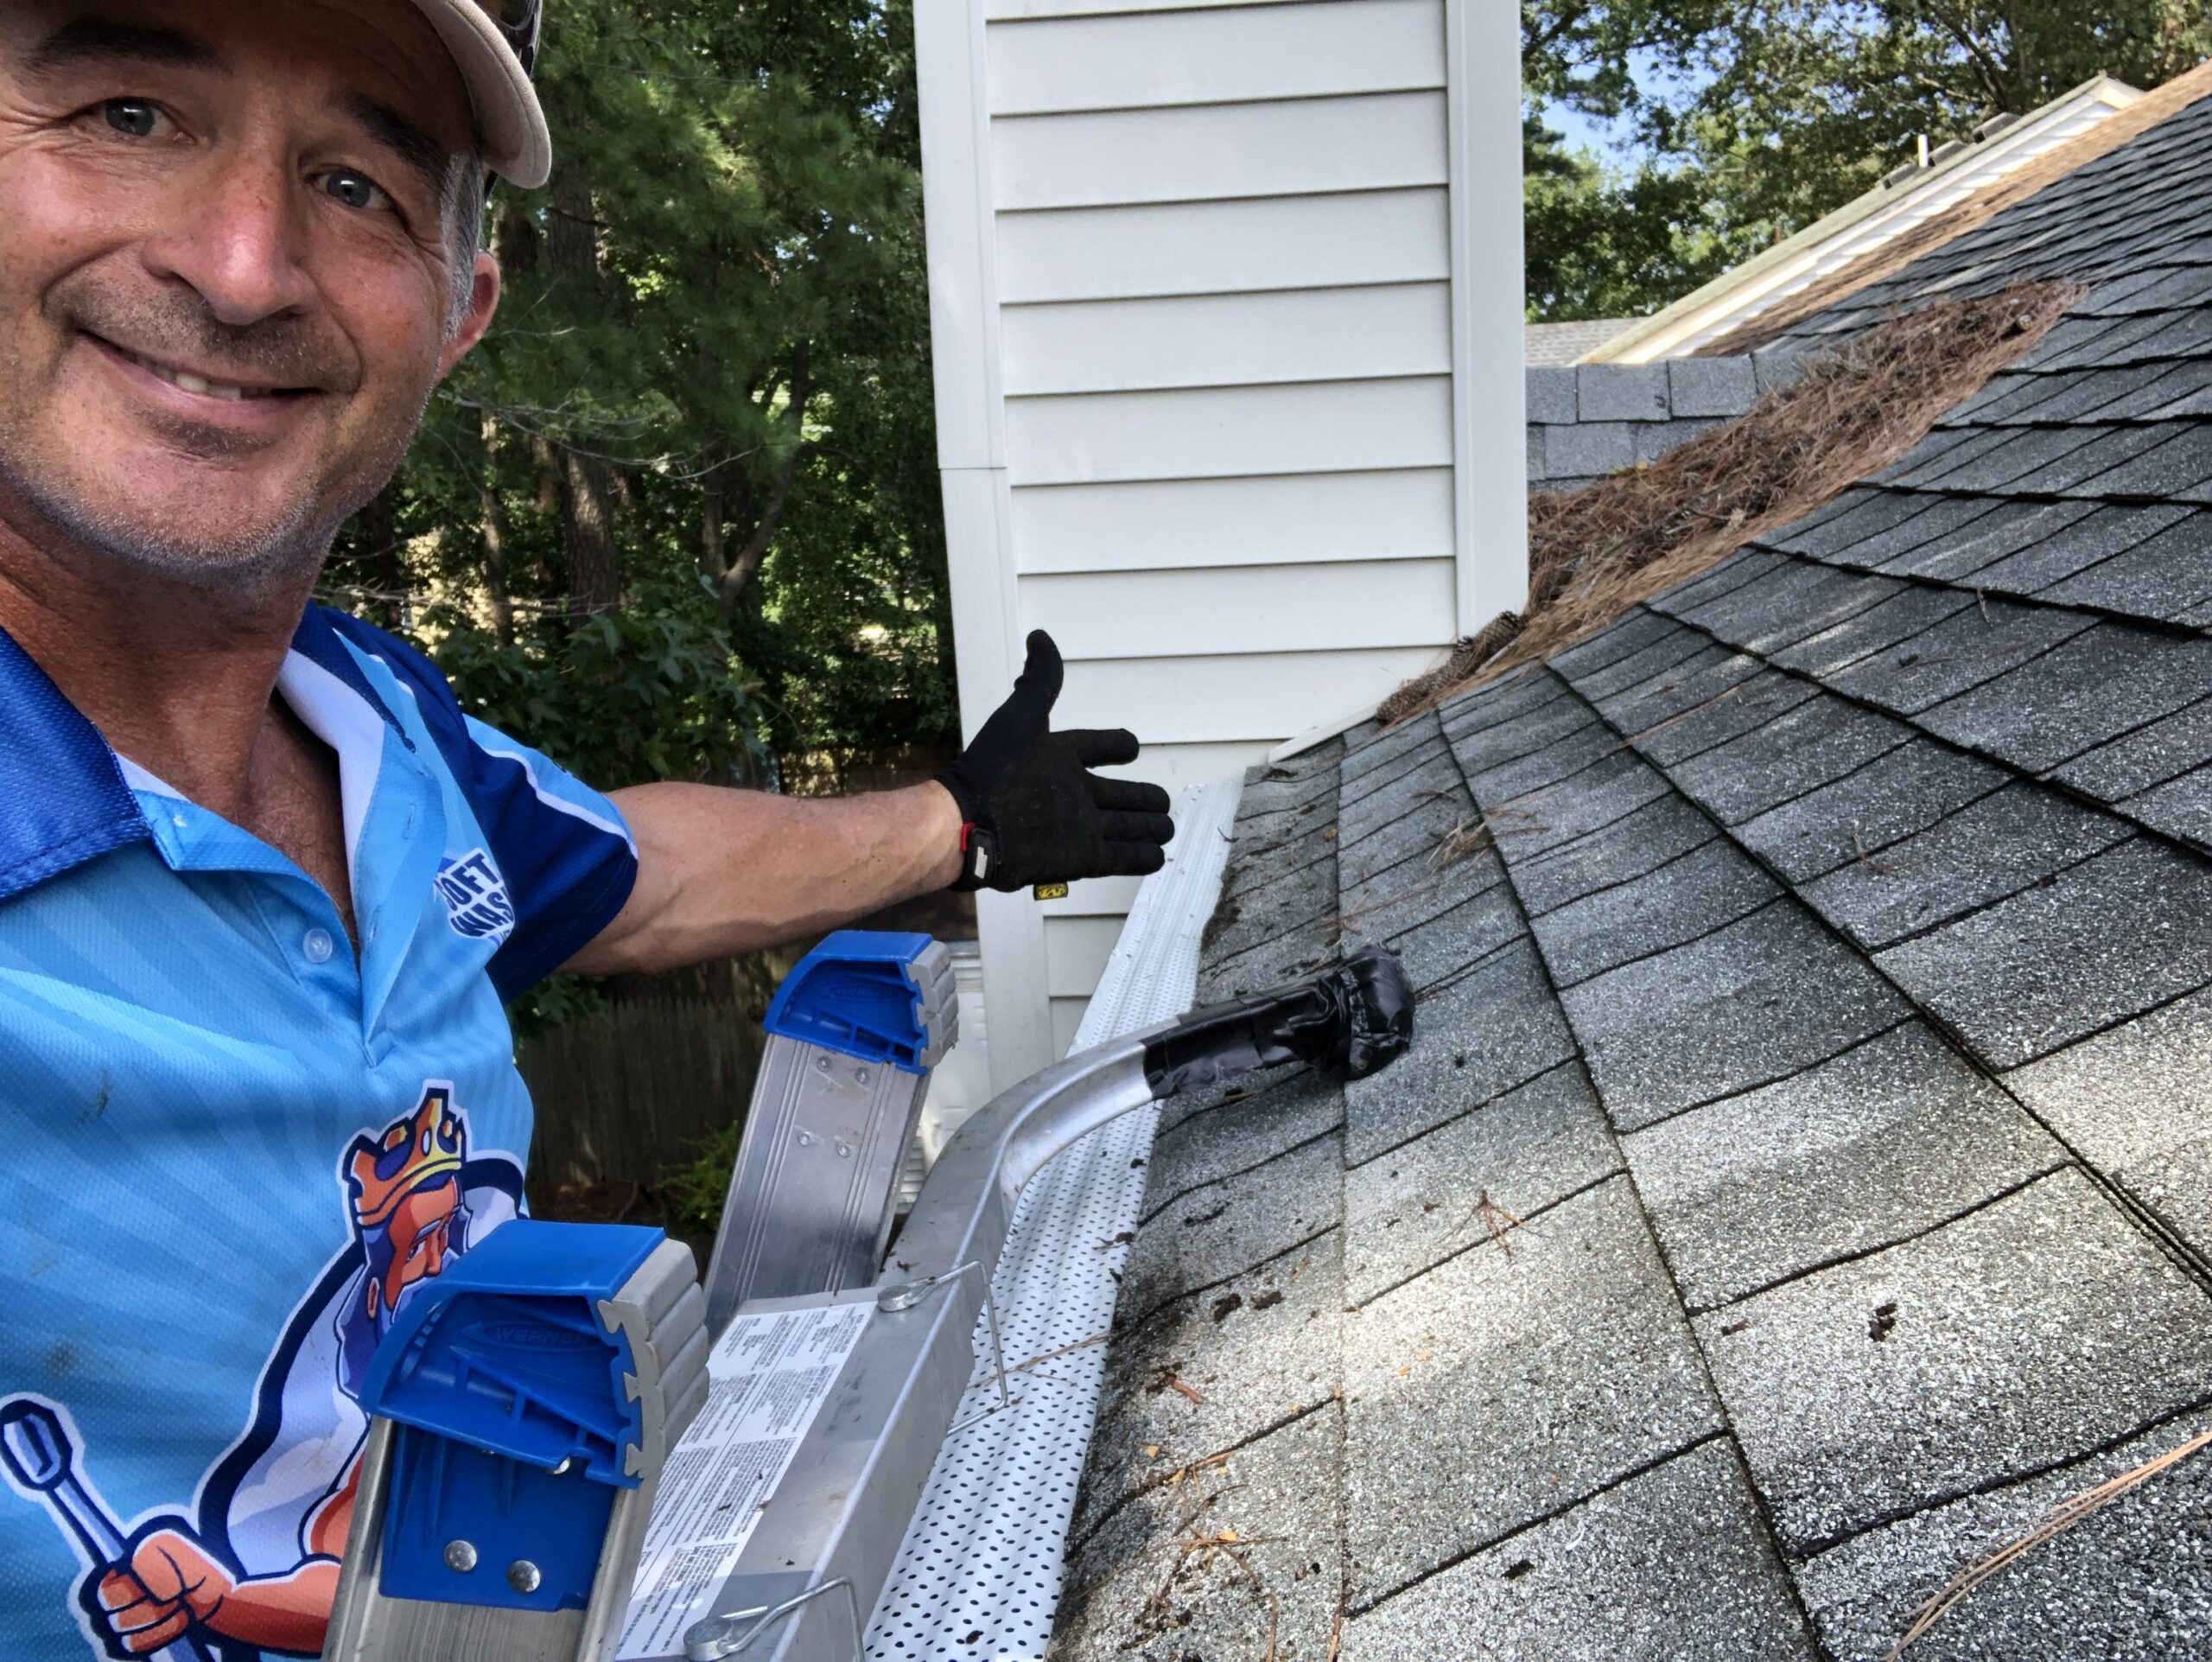
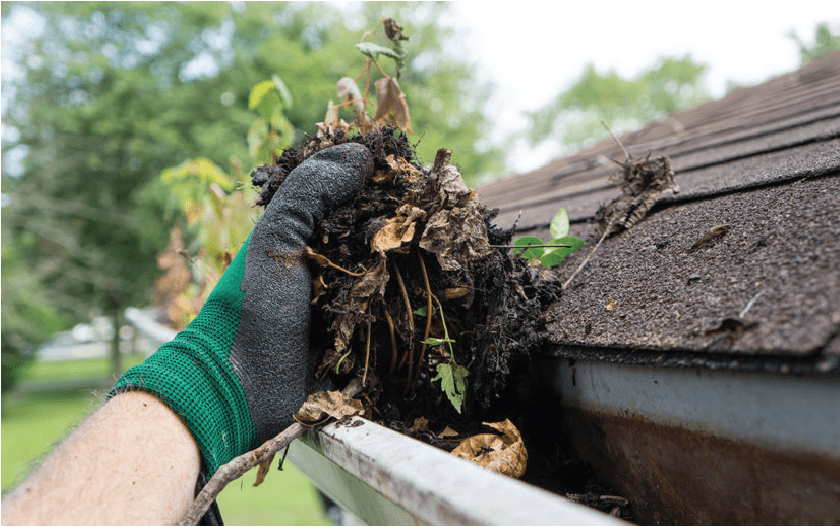
It’s early December so I thought I’d write about gutter cleaning in Virginia Beach. Leaves are falling heavily now and it won’t be long before the trees are bear. Perhaps you’ve spent some time wondering who’s going to rake up all those leaves. I think an even more important question you need to ask is; who’s going to get all those leaves out of my gutters?

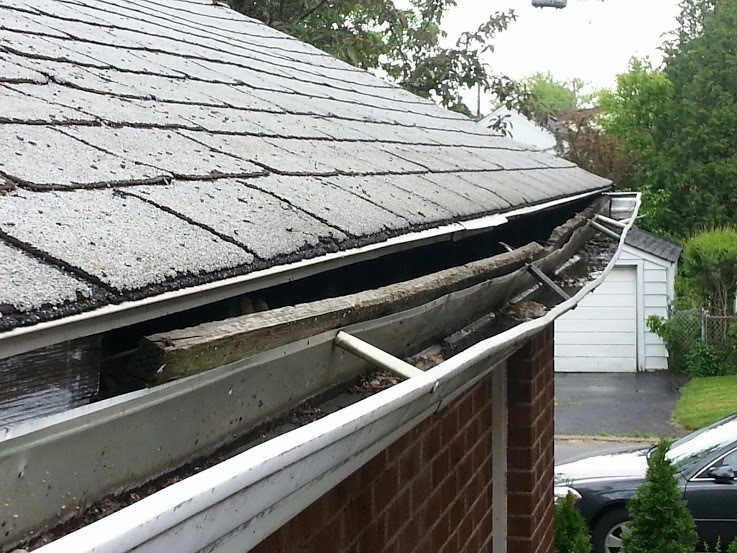
Clogged gutters can cause a host of problems that go unnoticed until it’s too late resulting in the need for expensive repairs to your home. Gutters are mainly designed to  guide rain and storm water off the roof and away from the foundation of your house. This protects your foundation and landscaping from erosion. Gutters can also keep you from getting soaked when entering your home by diverting rainwater away from entrances. 

Gutter Cleaning in Virginia Beach
Gutter Covers

After Your Gutter Cleaning in Virginia Beach

What many homeowners don’t understand is that your gutters should be cleaned three or four times during the fall. This is especially try if your home is situated amoung a bunch of large trees. It doesn’t take long for them to get clogged an cause rain water to backup into your soffets or rot fascia boards.

The easiest way to deal with getting your gutter cleaning in Virginia Beach is to have Neptune Clean install high quality gutter covers. Our Bulldog Brand gutter covers come with a 25 year warranty to never clog. Call us today for a free gutter cleaning with the installation of gutter covers.

Don’t take my word for gutter cleaning in Virginia Beach, ask Bob Vila

For an instant quote Click Here!

DIY Remote Downstream Injector Box

DIY Remote Downstream Injector Box

DIY Remote Downstream Injector Box

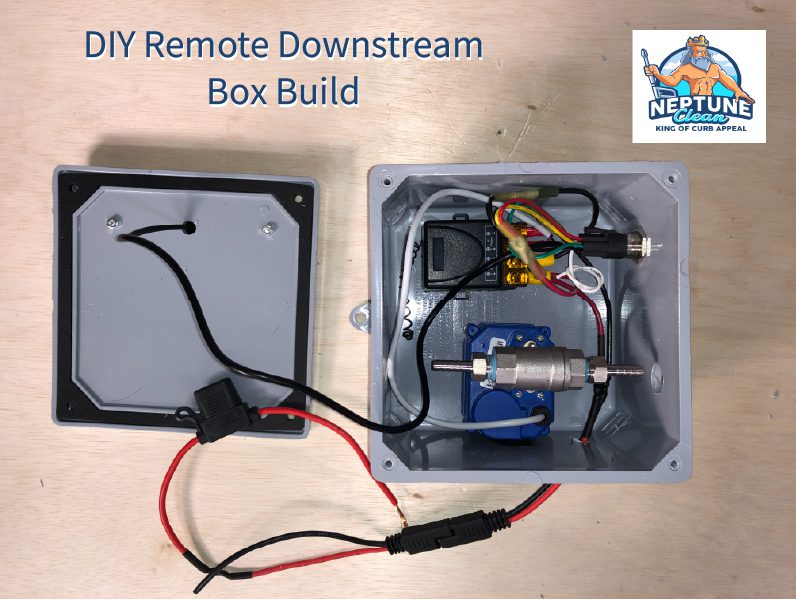
Hey, Bill Seith here with Neptune clean, I just wanted to do a quick video on a DIY Remote Downstream Injector Box. It’s been done on the internet a bunch of times, but I wanted to try to improve upon the videos, not the construction.

It’s not my invention, but it is an awesome device, especially if you work alone and you want to turn your down streaming process into a more proficient money-making machine.

This allows you to turn you to pull one hose, hydrate plants before you start and then remotely begin soaping when you’re ready. Then, when it’s time to rinse, you hit the remote off button and you’re ready to rinse again once all the soap is out of your hose.

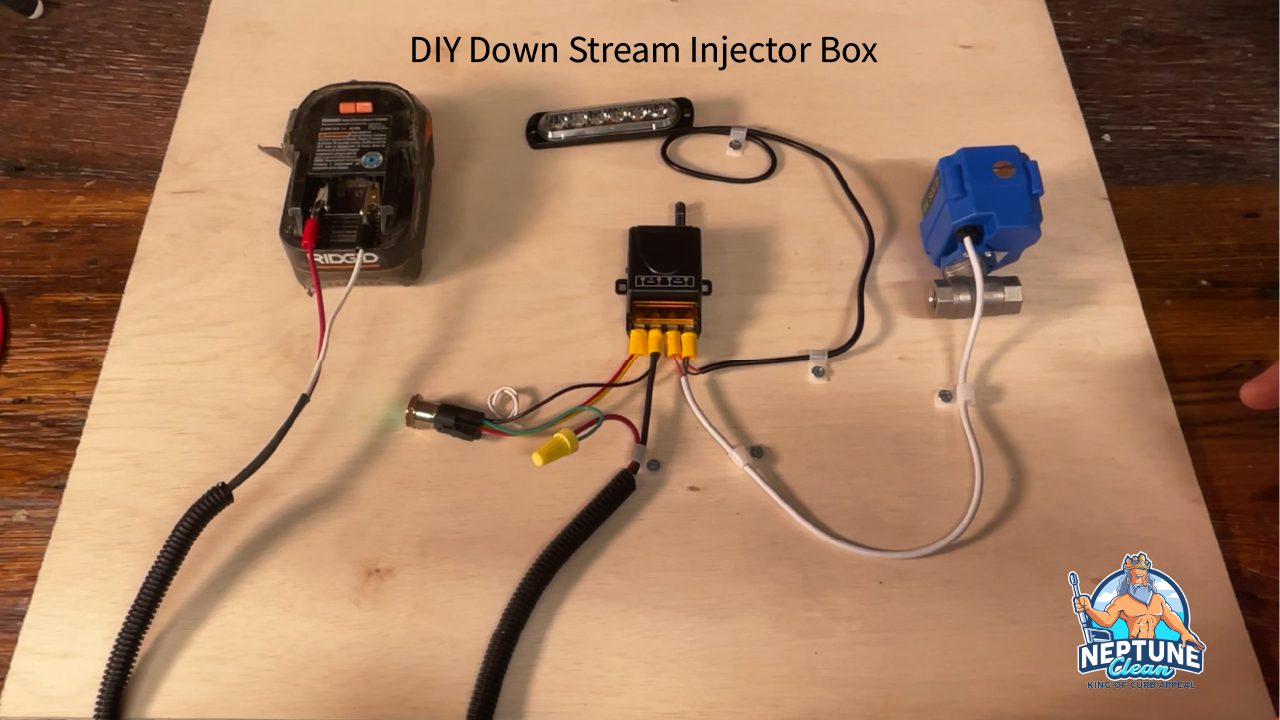
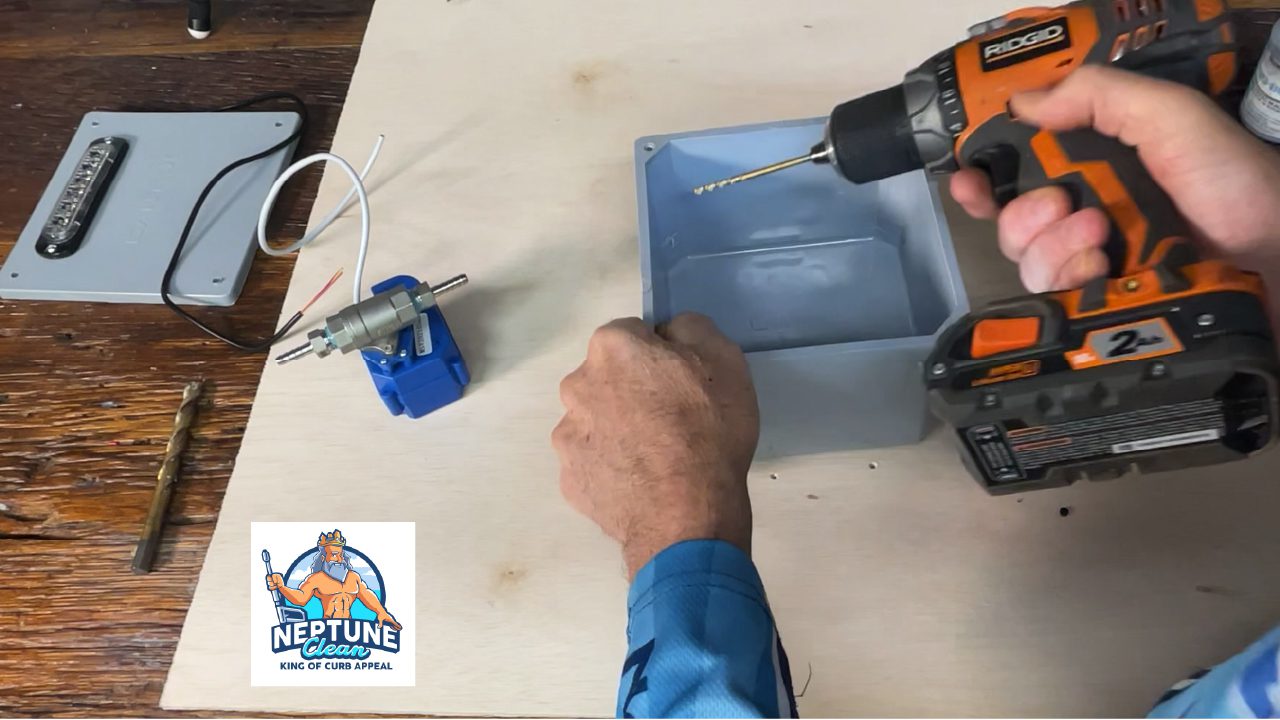
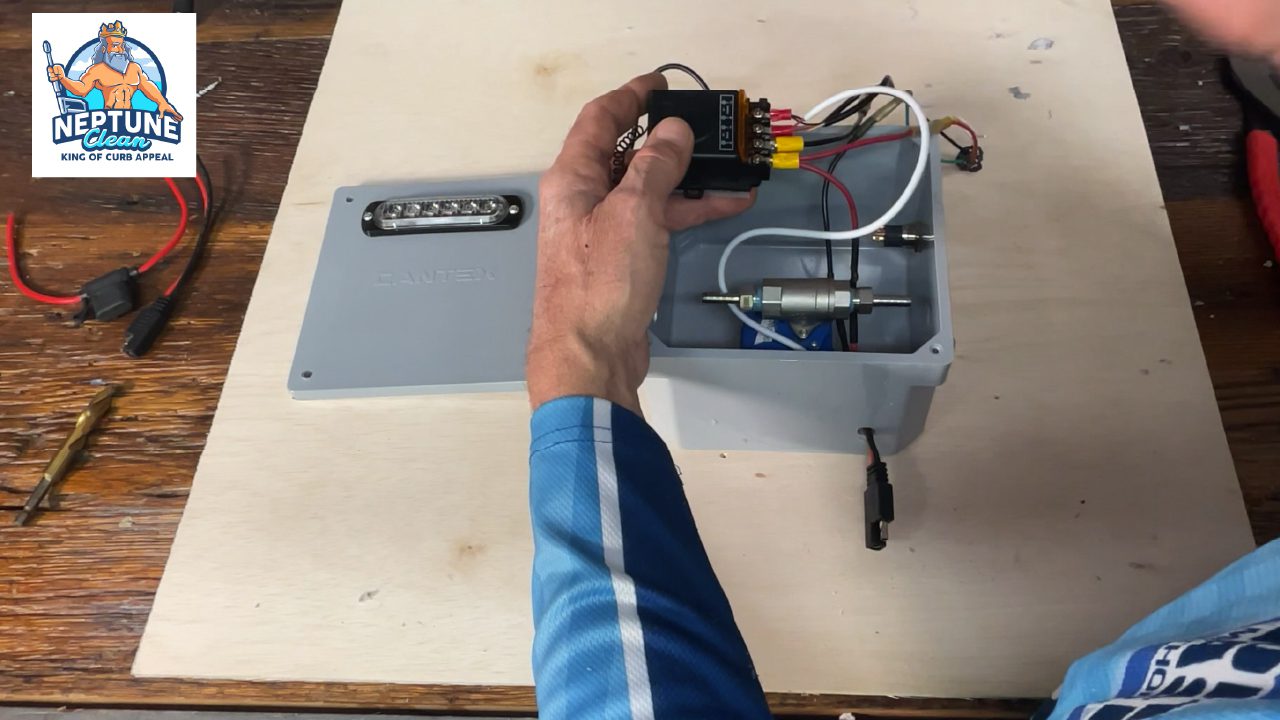
So, I’m in my home garage and I did something I think is cool. I laid the components out on the table and pre-wired everything so you can see how all the components get wired. Once I’m done showing you how it’s wired, I’ll go back and build the DIY Remote Downstream Injector Box.

One of the main problems with some of the videos out there is that the wiring isn’t explained very clearly. This gets confusing so I’m taking all the guesswork out of it by laying out each component, already wired, on a piece of plywood.

Once we go over the wiring, I’ll go ahead and drill the holes and place all the components in the box and show you how I how I put it together. After that, it’s ready to mount on your truck and hook up to your battery.

For this mockup, I’m using a 12V battery from my cordless drill. This system works using a handy dandy remote that communicates with a receiver inside the DIY Remote Downstream Injector Box.

DIY Remote Downstream Injector Box

The DIY remote downstream injector box has a receiver which is powered by the battery through the on/off switch. It also sends that power to the strobe light and the motorized ball valve. Once the box is energized by turning on the switch, the on/off function of the motorized soap valve is controlled by the remote switch.

The ball valve is used to allow the soap to flow into the downstream injector when turned on. Turn the remote switch off and the motorized ball valve shuts cutting off the flow of soap.

So, when you hit the button on the remote switch, bam! The strobe light come on, so you have a visual reference from afar that your soap valve is open or on. You never have to walk all the way back to the truck again. Bleach is flowing to your downstream injector.

Hit the off button, strobe light goes off the valve, shuts shutting off the soap. Now you can rinse without have to walk back to the truck.

The way I’ve got this rig set up; the most complicated part is the switch. So, I’m going to start with the outputs, the valve and the light are your outputs. You’ve got a red and a black wire for each one of these components.

You can wire the strobe and valve together, put the blacks on a connector and the red wires together on another connector.  You got a positive and a negative output on the receiver. Place the black wires on the negative output and the red wires on the positive outputs. And that’s pretty much it.

Battery side of the DIY Remote Downstream Injector Box

There are five (5) wires coming off the on/off switch. The white wire will not be used in this setup so you can wrap it up to clear it out of the way. The red and yellow wires are combined into one connector and hooked to the positive (input) on the receiver box.

The green from the switch gets connected to the positive side of the battery. Since I’m using a black and red wire combo, the red wire from the battery is spliced to the green from the switch. It is not connected to the receiver unit.

Lastly, strip the black wire from the battery and crimp it to a connector. It will be screwed down to the negative (input side) of the receiver unit.

And that’s it. It’s pretty simple. Next, I’ll go ahead and take this all apart and start drilling some holes in this box. I’ll show you how to put it together in here as well.

DIY Remote Downstream Injector Box

Assembling the DIY Remote Downstream Injector Box

The strobe light for the DIY remote downstream injector box is going to go in the top of the lid. I’m going to center the strobe light on the lid near the top and start drilling some holes. I need three (3) holes. One for the wire and two (2) more for the mounting screws.

The light is about six and three quarters of an inch long. So, I’m going to mark center point on the lid and drill a 3/8-inch hole for the wire. To mark the mounting holes for the screws, I fed the wires through my newly drilled wire hole to use the light as a template. With the light in position, I can mark the holes.

Next, I’ll remove the light, drill the holes for the screws and then assemble the light to the lid of the DIY Remote Downstream Injector Box. Don’t forget feed the gasket through the wire before mounting the light.

Now that the strobe light is mounted to the lid, I can strip this wire to prepare it for the next step.

DIY Remote Downstream Injector Box

Preparing the motorized ball valve for Installation.

 Before I can mark the holes for the motorized ball valve, I need to install the 1/4-inch barbed fittings. I like to use the True-blue Pipe dope. I think it’s the best stuff for non-pressurized fittings so obviously, you can’t use this on your pressure washer fittings.

 Once you apply the pipe sealer to the fittings, screw them into the ball valve and cinch it down just slightly tighter than hand tight using a wrench.

 Now I can use the valve assembly to mark the holes for the hoses. Once I place the valve inside DIY Remote Downstream Injector Box just slide it over and put a mark on the box where it hits.

 You can also apply some paint or ink to the end of the barbed fitting and slide it over to touch the box. It should make a mark where you need to drill the holes. Do that for each side and you’re ready to drill the two holes for the input and output holes for the soap.

 I use a reinforced quarter inch inside diameter hose. The outside diameter of the hose is ½ inch. You can drill a ½” hole and feed the hose through or you can drill a larger hole if you intend to install a grommet. The grommet obviously must have a ½ inch inside diameter for the hose so the hole size will need to be slightly larger based on the thickness of your grommet.

 I just had to put them in later. But you know. Let’s see, so in the next hole, I got a drill is for the switch, and so the way that my truck is laid out, I want to put I want to put this switch on on the on this side here.

 I need two more holes to finish off the box. One for the on/off switch and one for the battery wires. I’m now ready to assemble the DIY Remote Downstream Injector Box.

 Installing the on/off switch is easy. Make sure the gasket or o-ring is in place, feed the switch through the hole in the box and screw the nut from the back to hold it in place. Hand tight should be enough to hold it in place.

Paring the Strobe Light and Motorized Ball Valve to the DIY Remote Downstream Injector Box

The worst thing about paring the strobe wires to the motorized ball valve wires in the DIY remote downstream injector box are the tiny gauge of the wires. The red and black wires are so small that you must use great care when stripping the sheathing from the wire. Be careful to strip only the sheathing and not cut the wire itself.

Once you have the stripped, the red from the strobe and the red from the valve are twisted together and crimped to the wire terminal. The same thing goes for the black from the storb and the black from the valve.

Now you can connect them to the receiver. The black wire terminal is connected to the negative (output) side and the red wire terminal is connected to the positive (output) side of the receiver.

Now it’s time to secure the motorized ball valve inside the box. I’m using Velcro tape to hold it in place. This way I can remove it easily if repairs are ever needed.

Completing the DIY Remote Downstream Injector Box Wiring

Before I commit to installing the receiver into the box, it’s time to connect the input side of the switch. The input side of the receiver has two connections as well. A positive side and a negative side.

The black wire from the battery connects to the negative (input) side and the red and yellow wires from the switch are connected to the positive (input) side of the receiver. I’m using a pigtail connector from the battery to ensure the box is easily removed without having to cut the wires.

It’s a quick disconnect. You can pull the whole box off if you need to work on it and then be able to connect it back up again. I’m also installing an inline fuse to protect the whole system.

Lastly, don’t forget the green wire from the switch connects to the red (positive) wire from the battery. That’s about it, now you can connect everything to the receiver and then install the receiver into the box.

Now you can put the gasket on the box cover and install the cover on the box. I’m done, except for, hooking up the actual hoses on the truck and then connecting the battery and it’ll be ready to go.

Cost of building a DIY Remote Downstream Injector Box Versus Purchasing Pre-Built Unit

In the end I spent around $130 dollars to build this unit which is about 75% cheaper than purchasing a pre-built unit. Check out this link to see the cost of a Pre-Built Downstream Injector Box.

Click this link for more information on running your own pressure washing company.

Pressure Wash a House, The Ultimate Homeowners Guide

Pressure Wash a House, The Ultimate Homeowners Guide

pressure wash a house

Tips To Pressure Wash a House

As the owner of Neptune Clean, and highly trained Jedi-Washer, I often hear homeowner confessions of failed DIY home cleaning attempts. The conversation always begins with “I have my own pressure washer but…” followed by the problem they encountered.

I always encourage homeowners to save money where they can. Heck I’m an avid DIY’er so I can’t blame them for wanting to take care of a simple exterior house cleaning project.

When you pressure wash a house, one common mistake homeowners make is using too much pressure to wash their siding to remove organic contaminants like mold, mildew, and algae. Using “high pressure” can damage siding. It can also force water under vinyl siding, into soffits, or under door and window jambs.

Brick is more forgiving of course but wood siding like cedar is more fragile than vinyl. What homeowners don’t realize when they pressure wash a house is that professionals rely on cleaners and each of these siding types require a different type of cleaner.

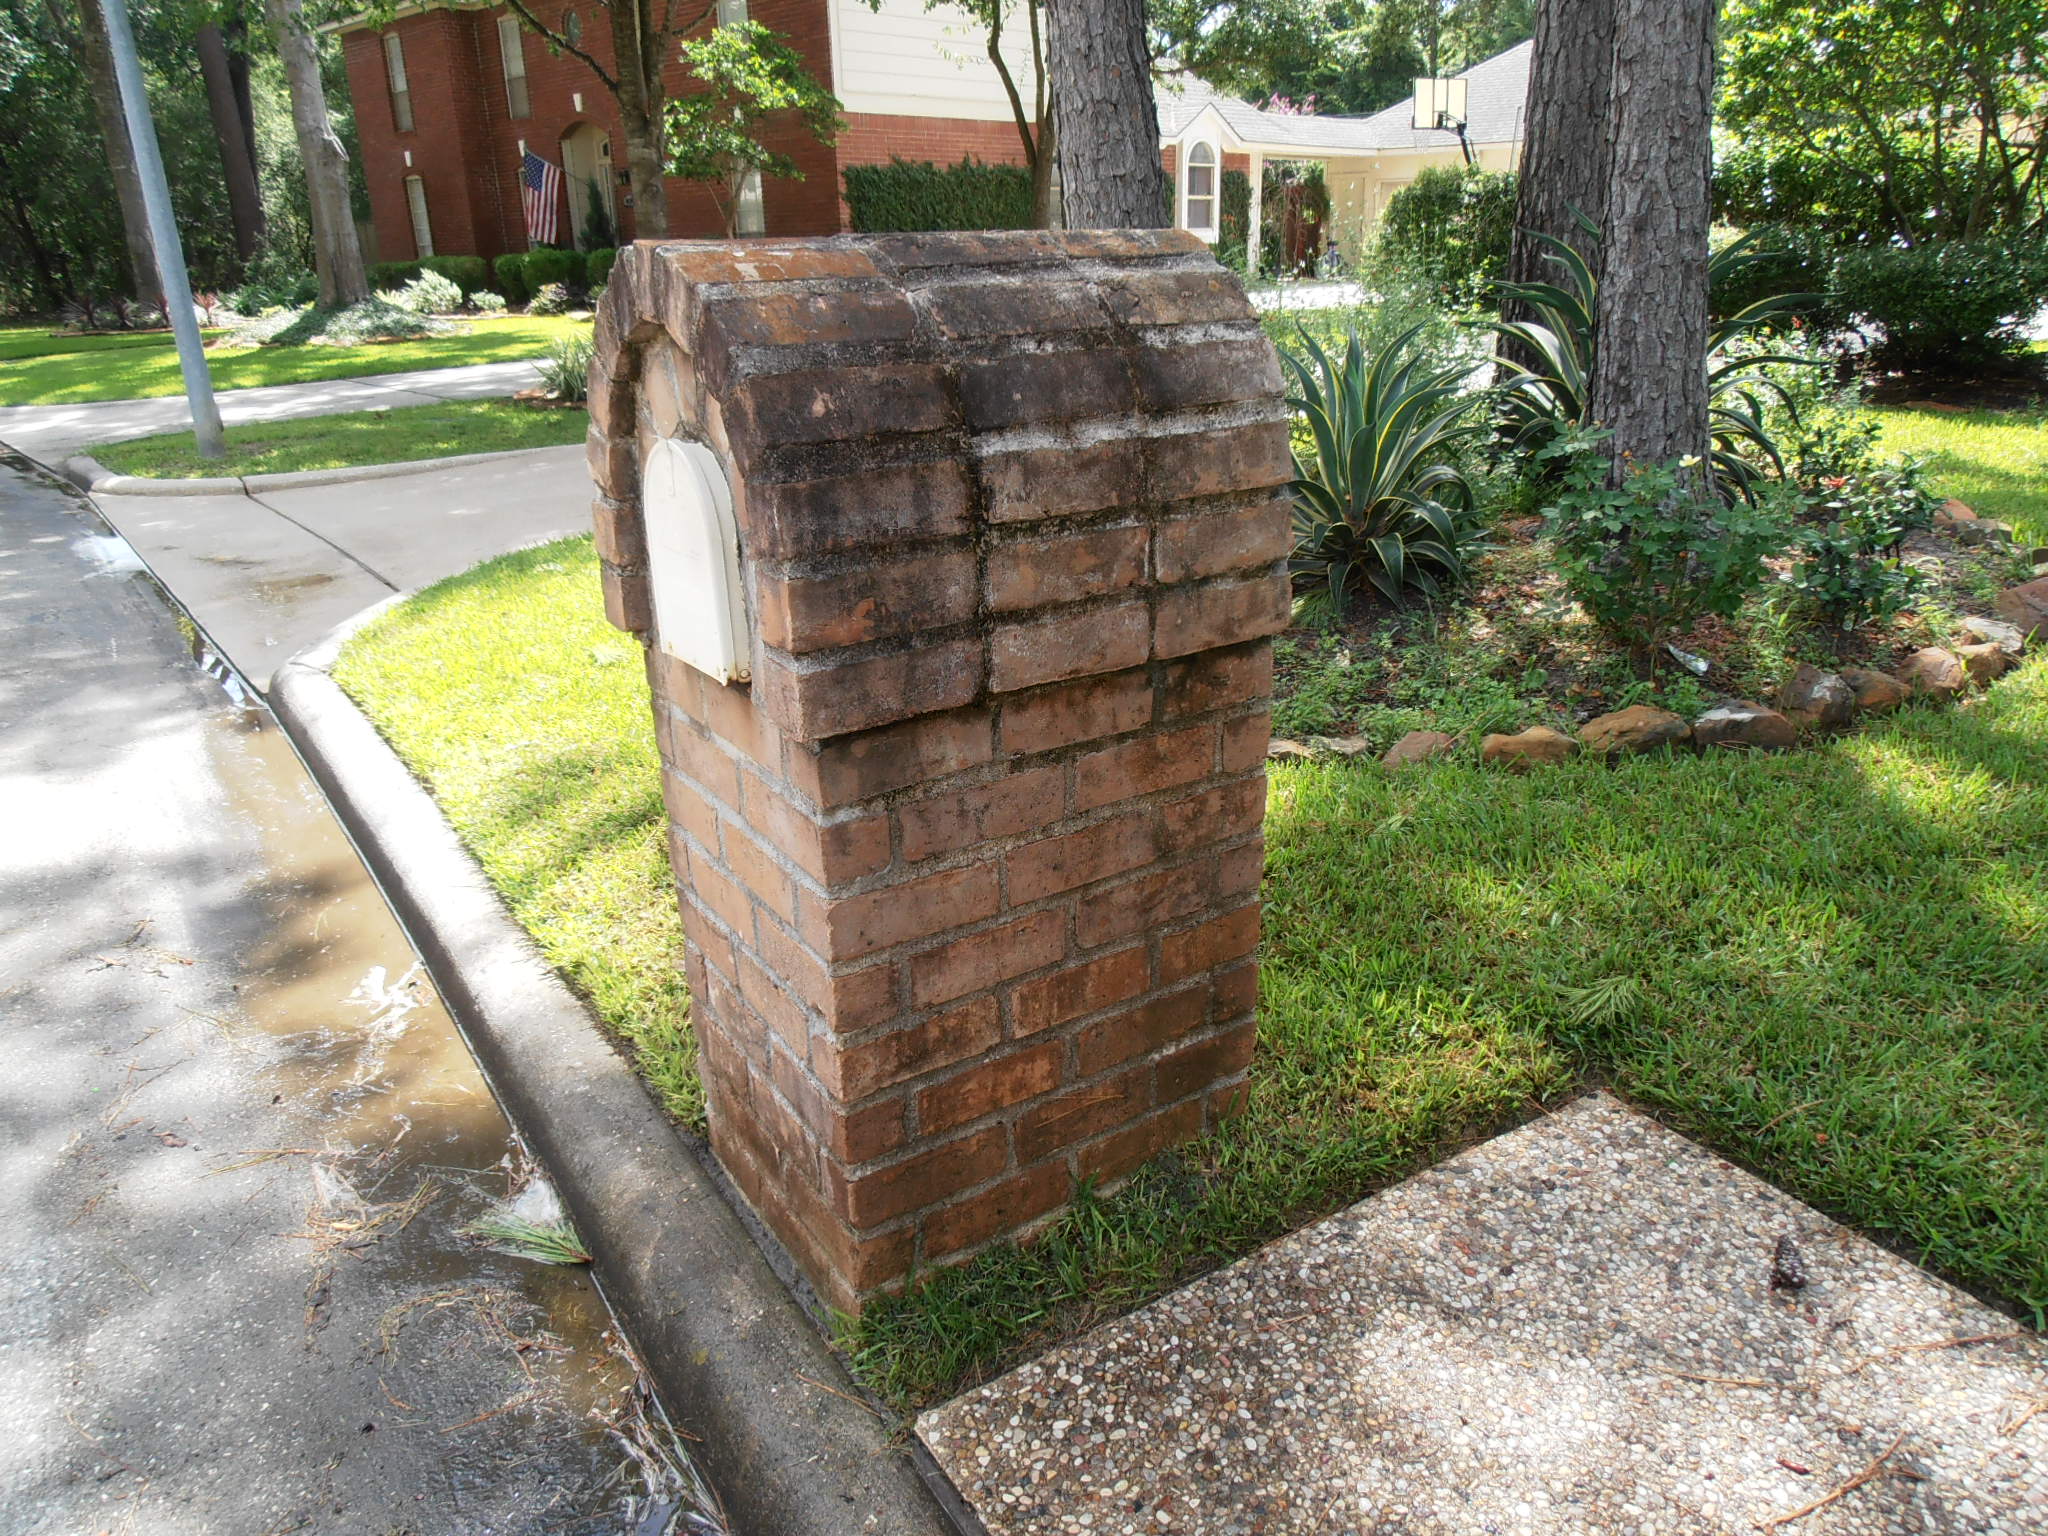
before mailbox clean
Soft Wash Docks Piers

My first pressure wash a house tip:

Professionals use a “soft wash” method to apply a cleaning agent rather than actually pressure washing a house. The most common cleaner is a diluted blend of sodium hypochlorite (bleach) and surfactant detergents.

The mild soap is applied with a low-pressure spray to all the surfaces of your siding. The soap does the work (not the pressure washer) and removes the organic material. All you must do after a short dwell time is give your home a good rinse.

Here’s my second pressure washing tip:

Before you pressure wash a house, hydrate all the plants and grass around your home to protect them from the cleaning agent. A thin coat of water fills the cells on the surface of leaves reducing exposure to the cleaner. If left unprotected, direct exposure to cleaning agents may burn leaves and grasses.

Here’s my third pressure a house tip:

Before cleaning your home, cover anything you don’t want exposed to the cleaning agents like copper light fixtures, door handles or exotic wood doors. Sodium Hypochlorite will accelerate rust on iron or the patina on copper. Also tape electrical outlets where they meet the siding to reduce the chance of tripping a GFCI circuit breaker.

Here’s how to safely clean home siding yourself:

Most homeowner level pressure washers have a downstream attachment that allow you to “softwash” your home. You can purchase house siding cleaners from the big box home stores. They sell it by the gallon, and it works well with the downstream feature of your pressure washer.

Here’s my fourth pressure washing tip:

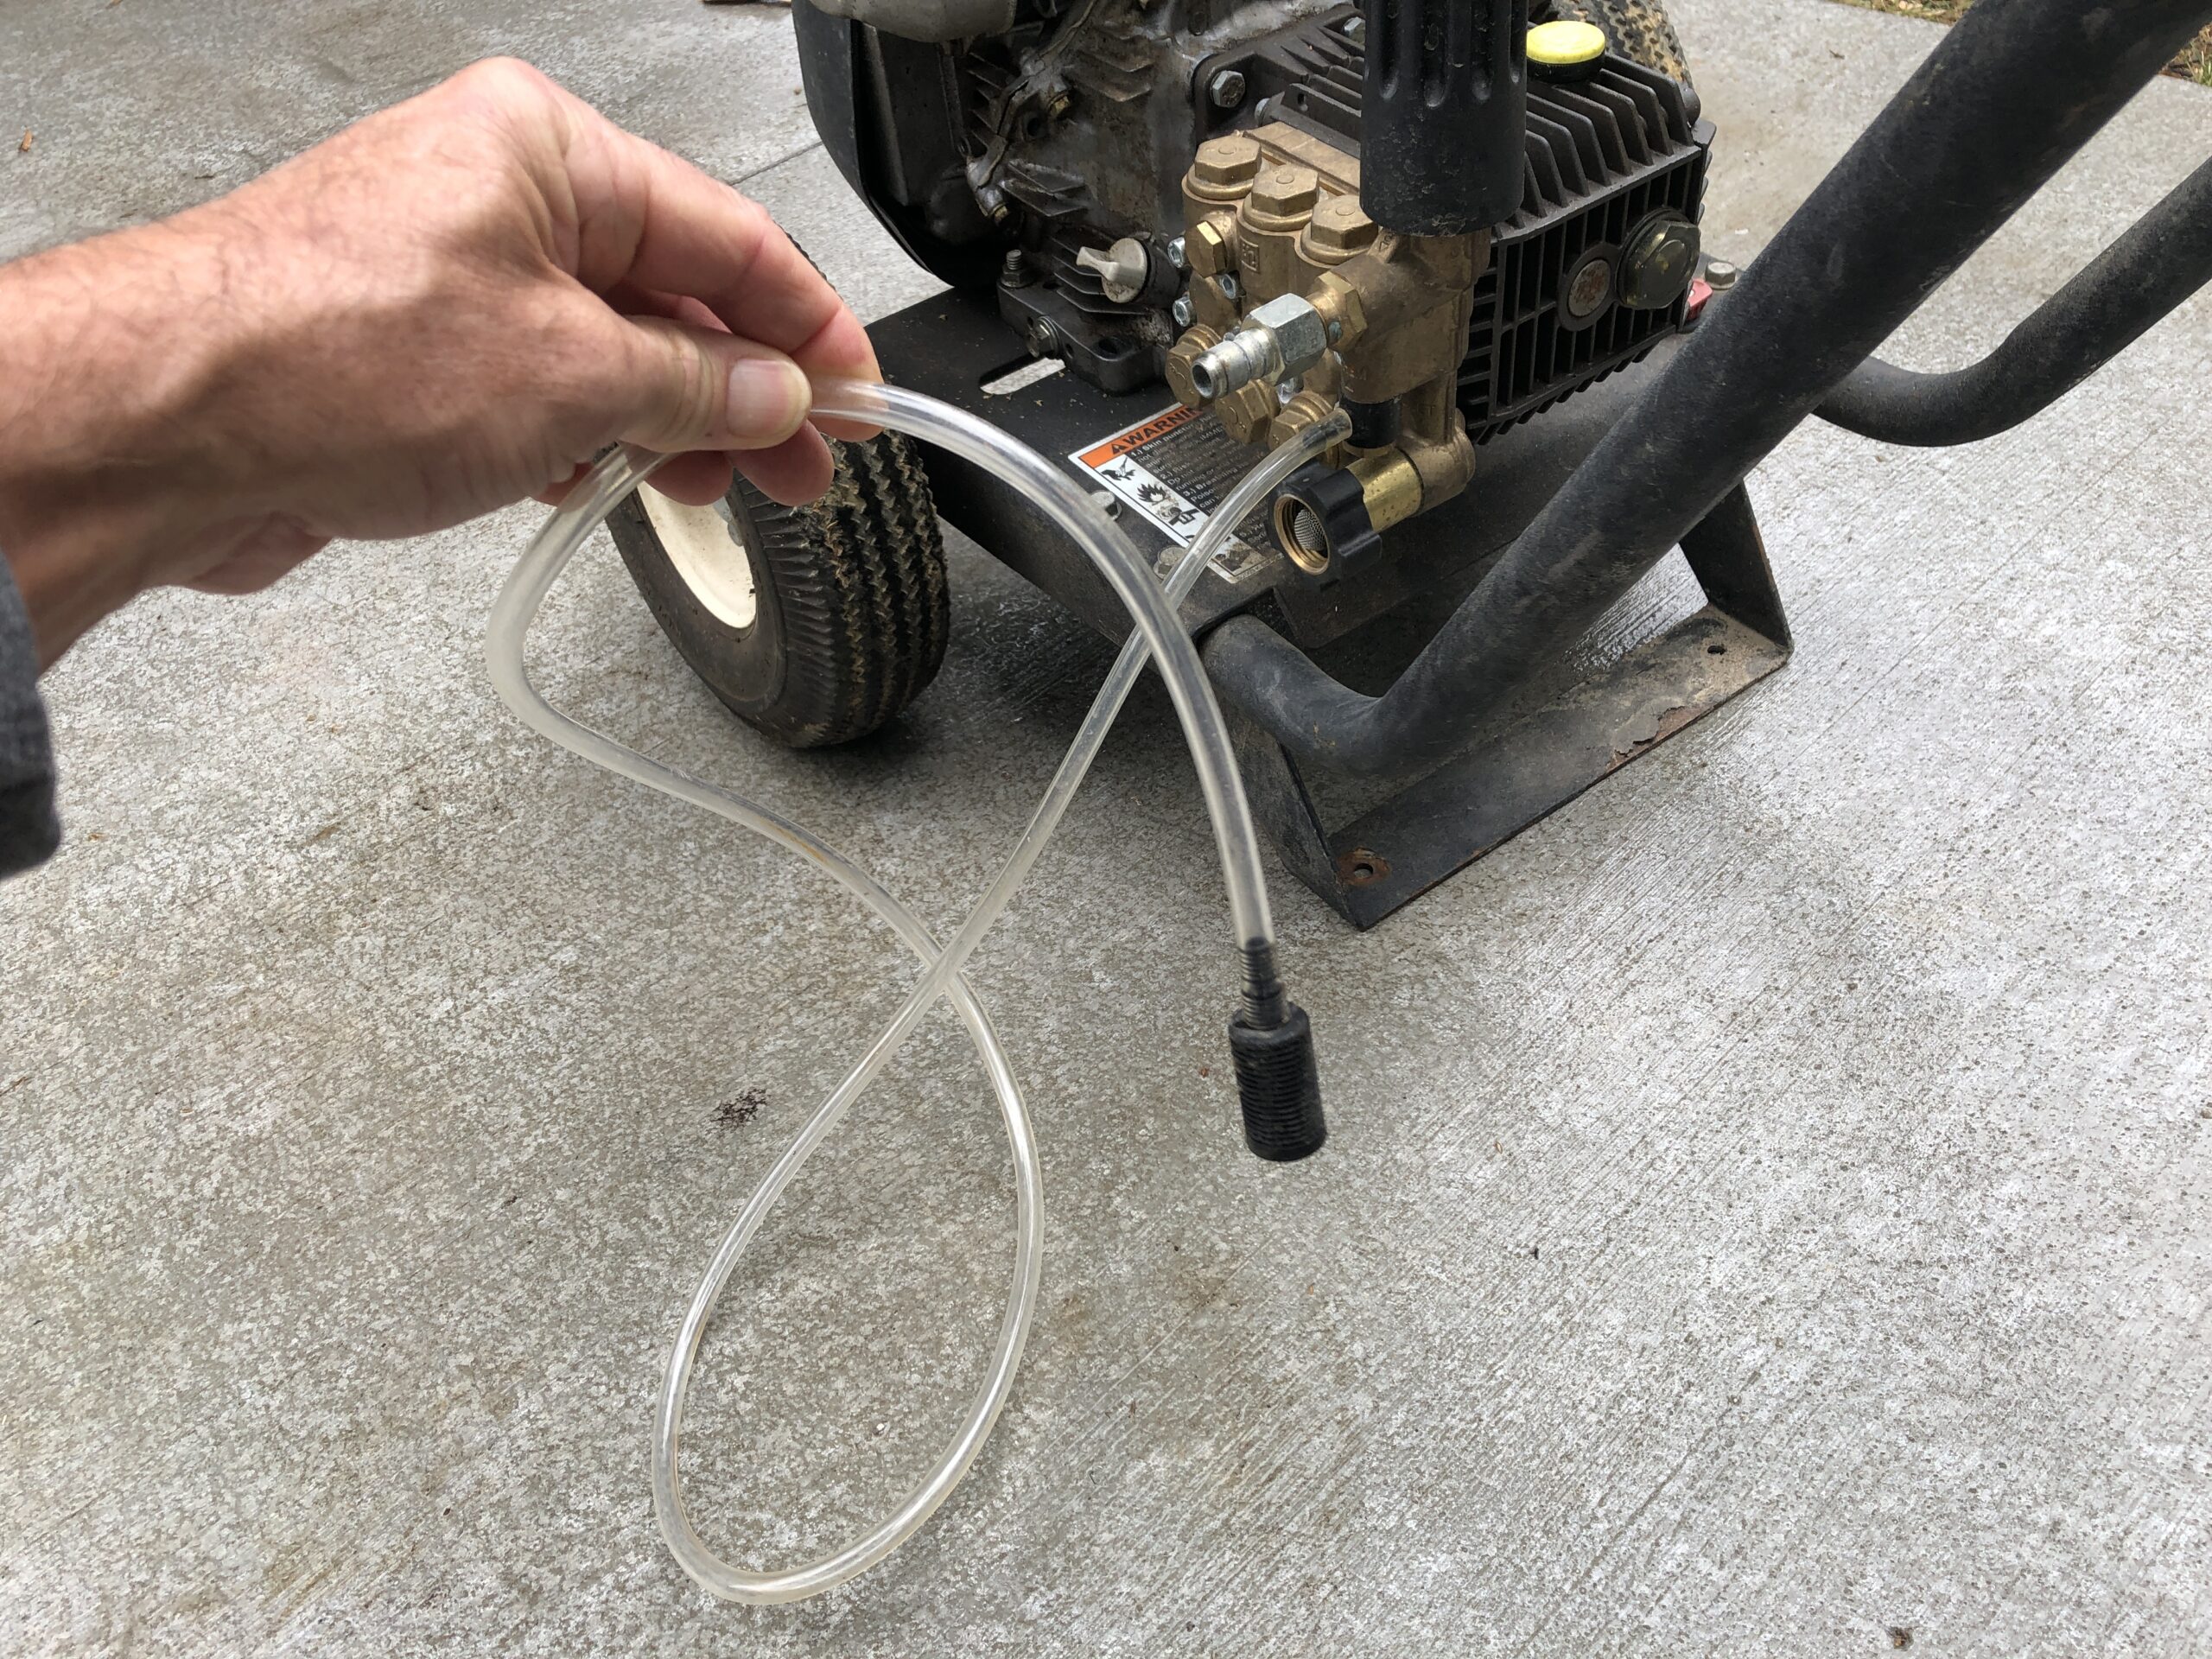
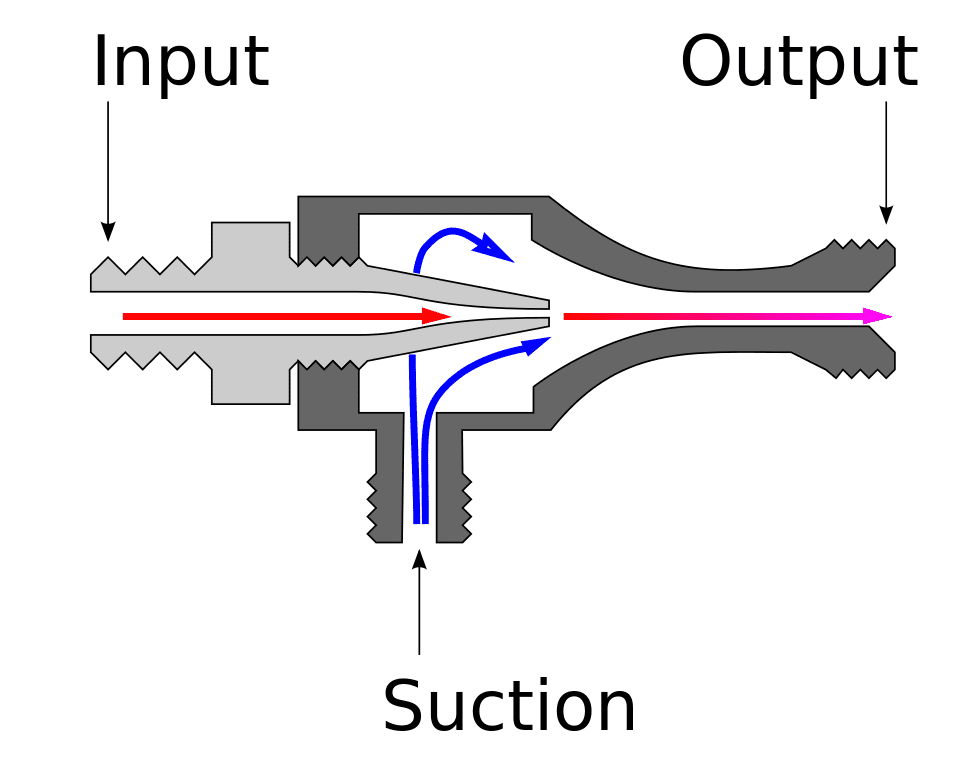
Your downstream attachment uses a venturi effect to draw cleaners into the flow of water going to your hose and nozzle. It’s typically at a 4-1 ratio. That’s 4 gallons of water to 1 gallon of cleaner it draws.

So, if the cleaner you purchase recommends diluting your cleaner 4-1, you simply drop the downstream pickup tube from your pressure washer into the cleaner and you’ve got a 4-1 ratio you’re spraying on your home.

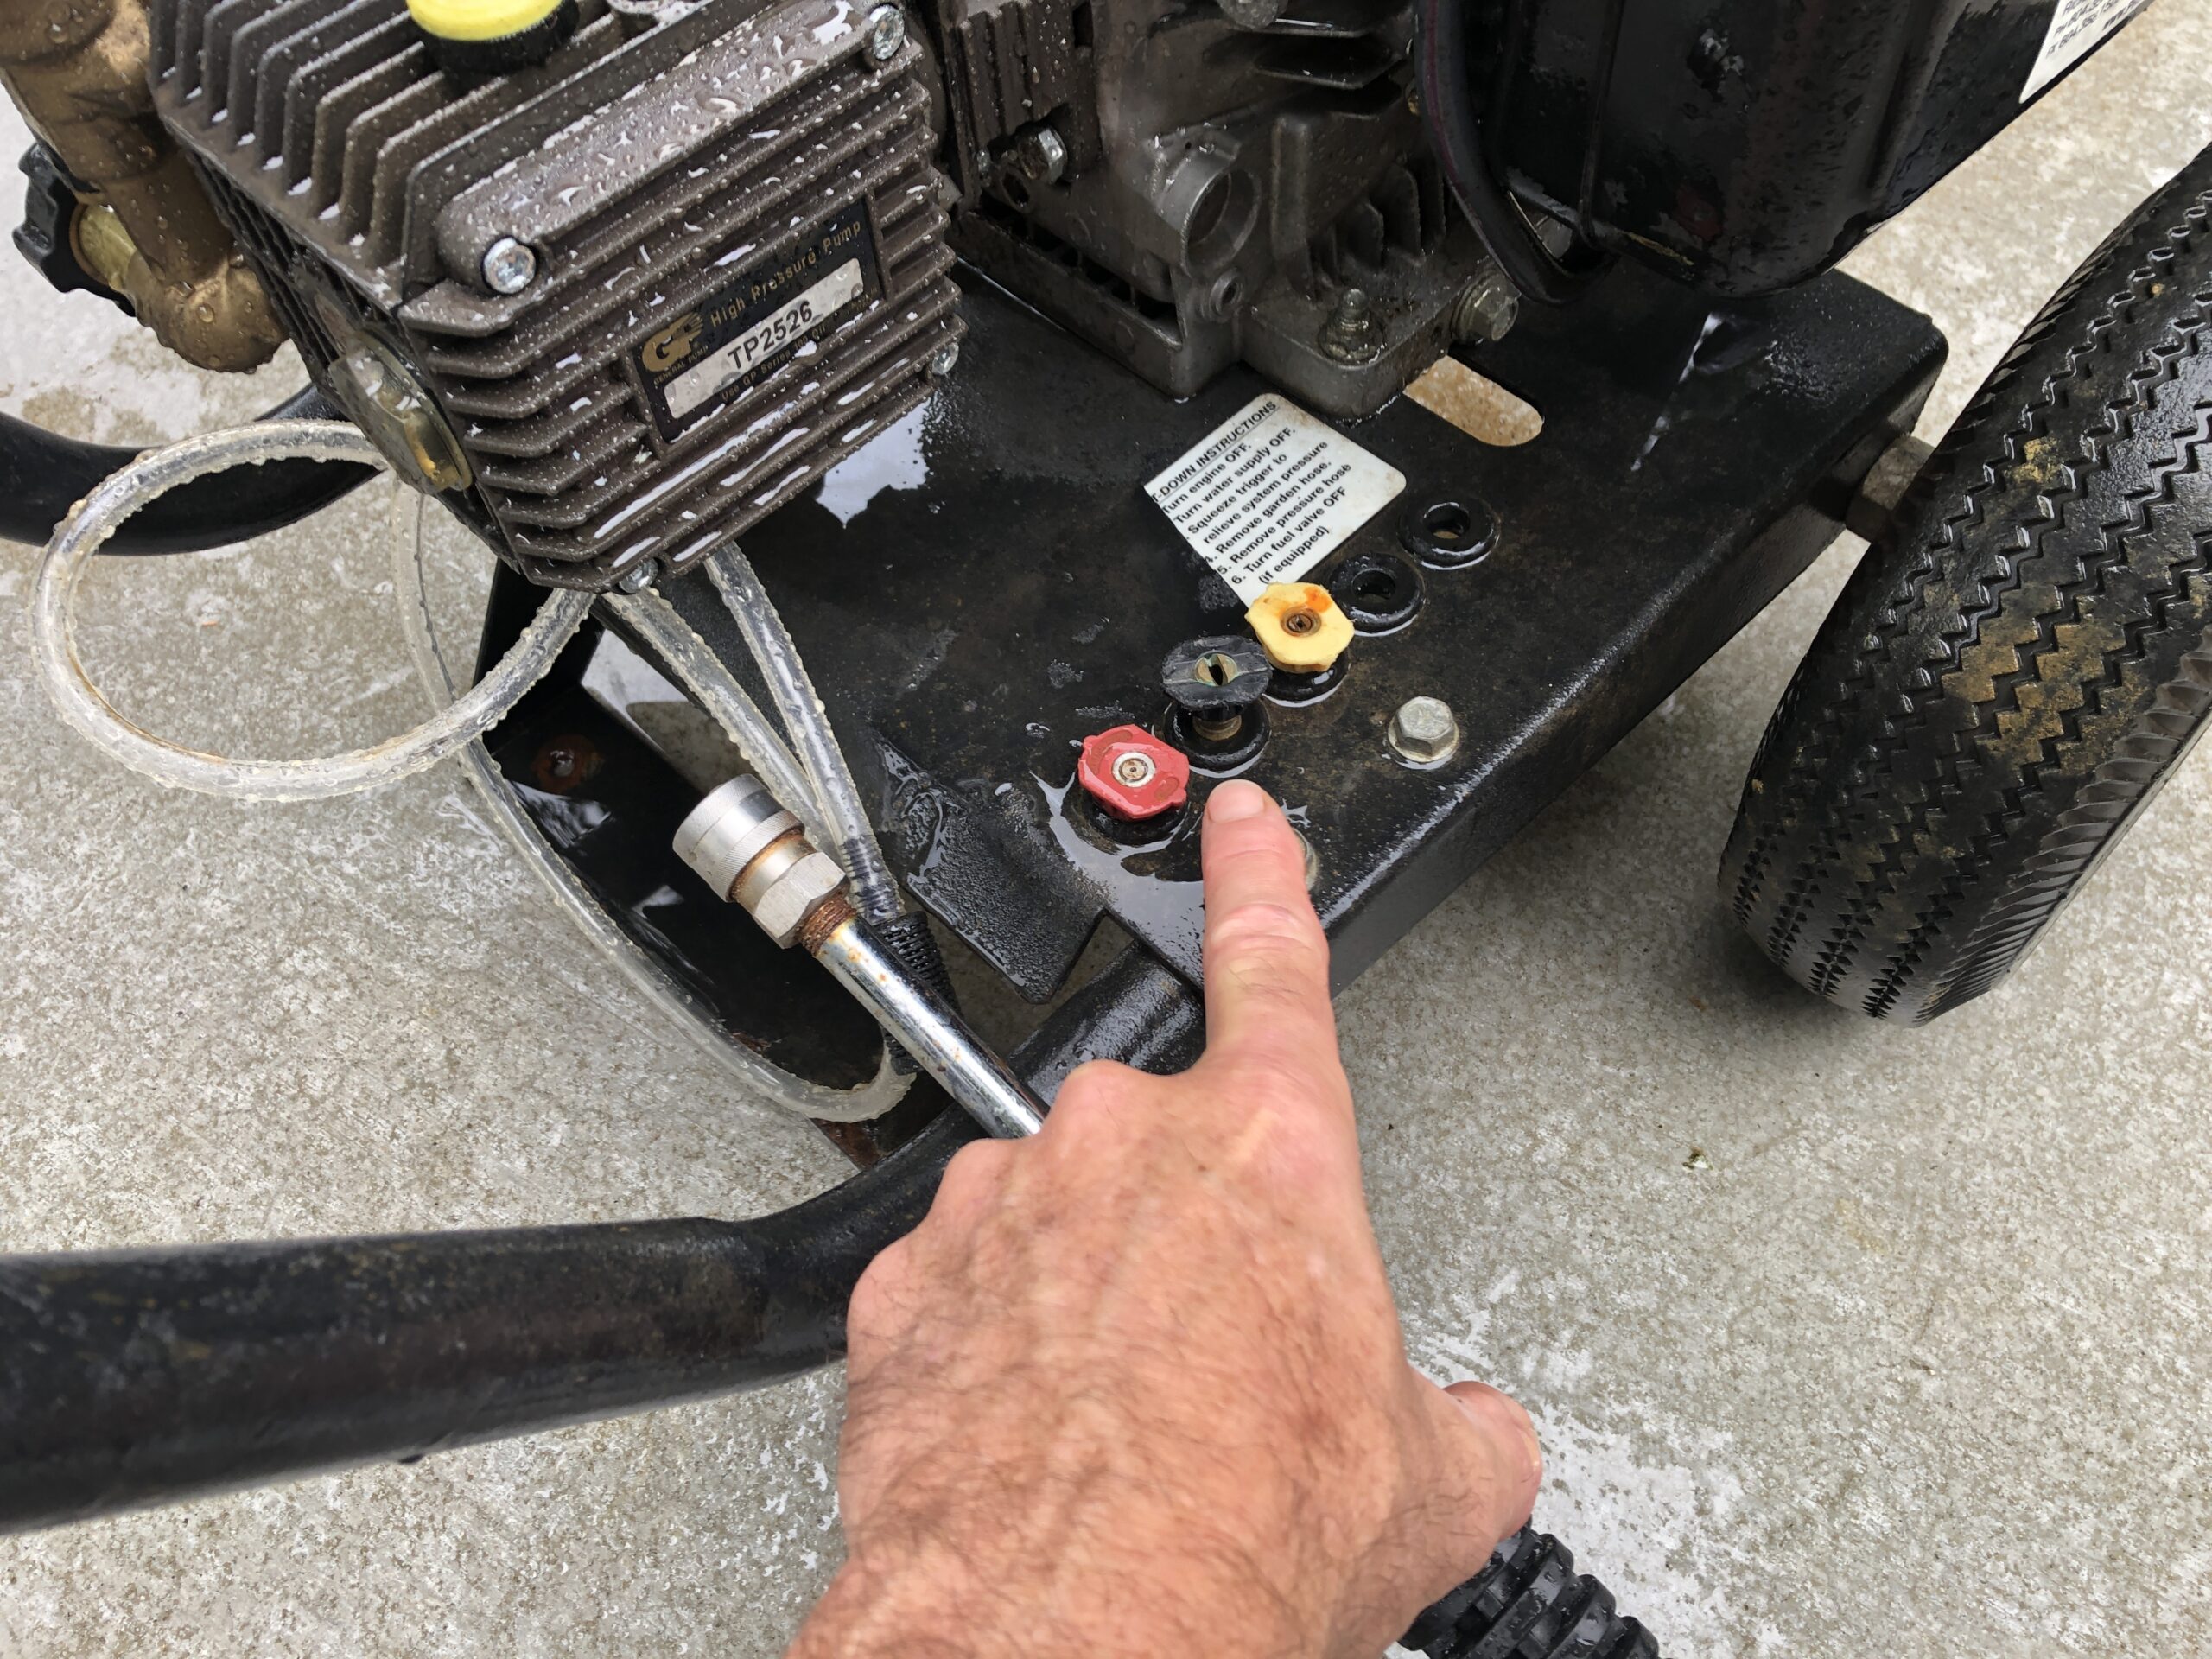
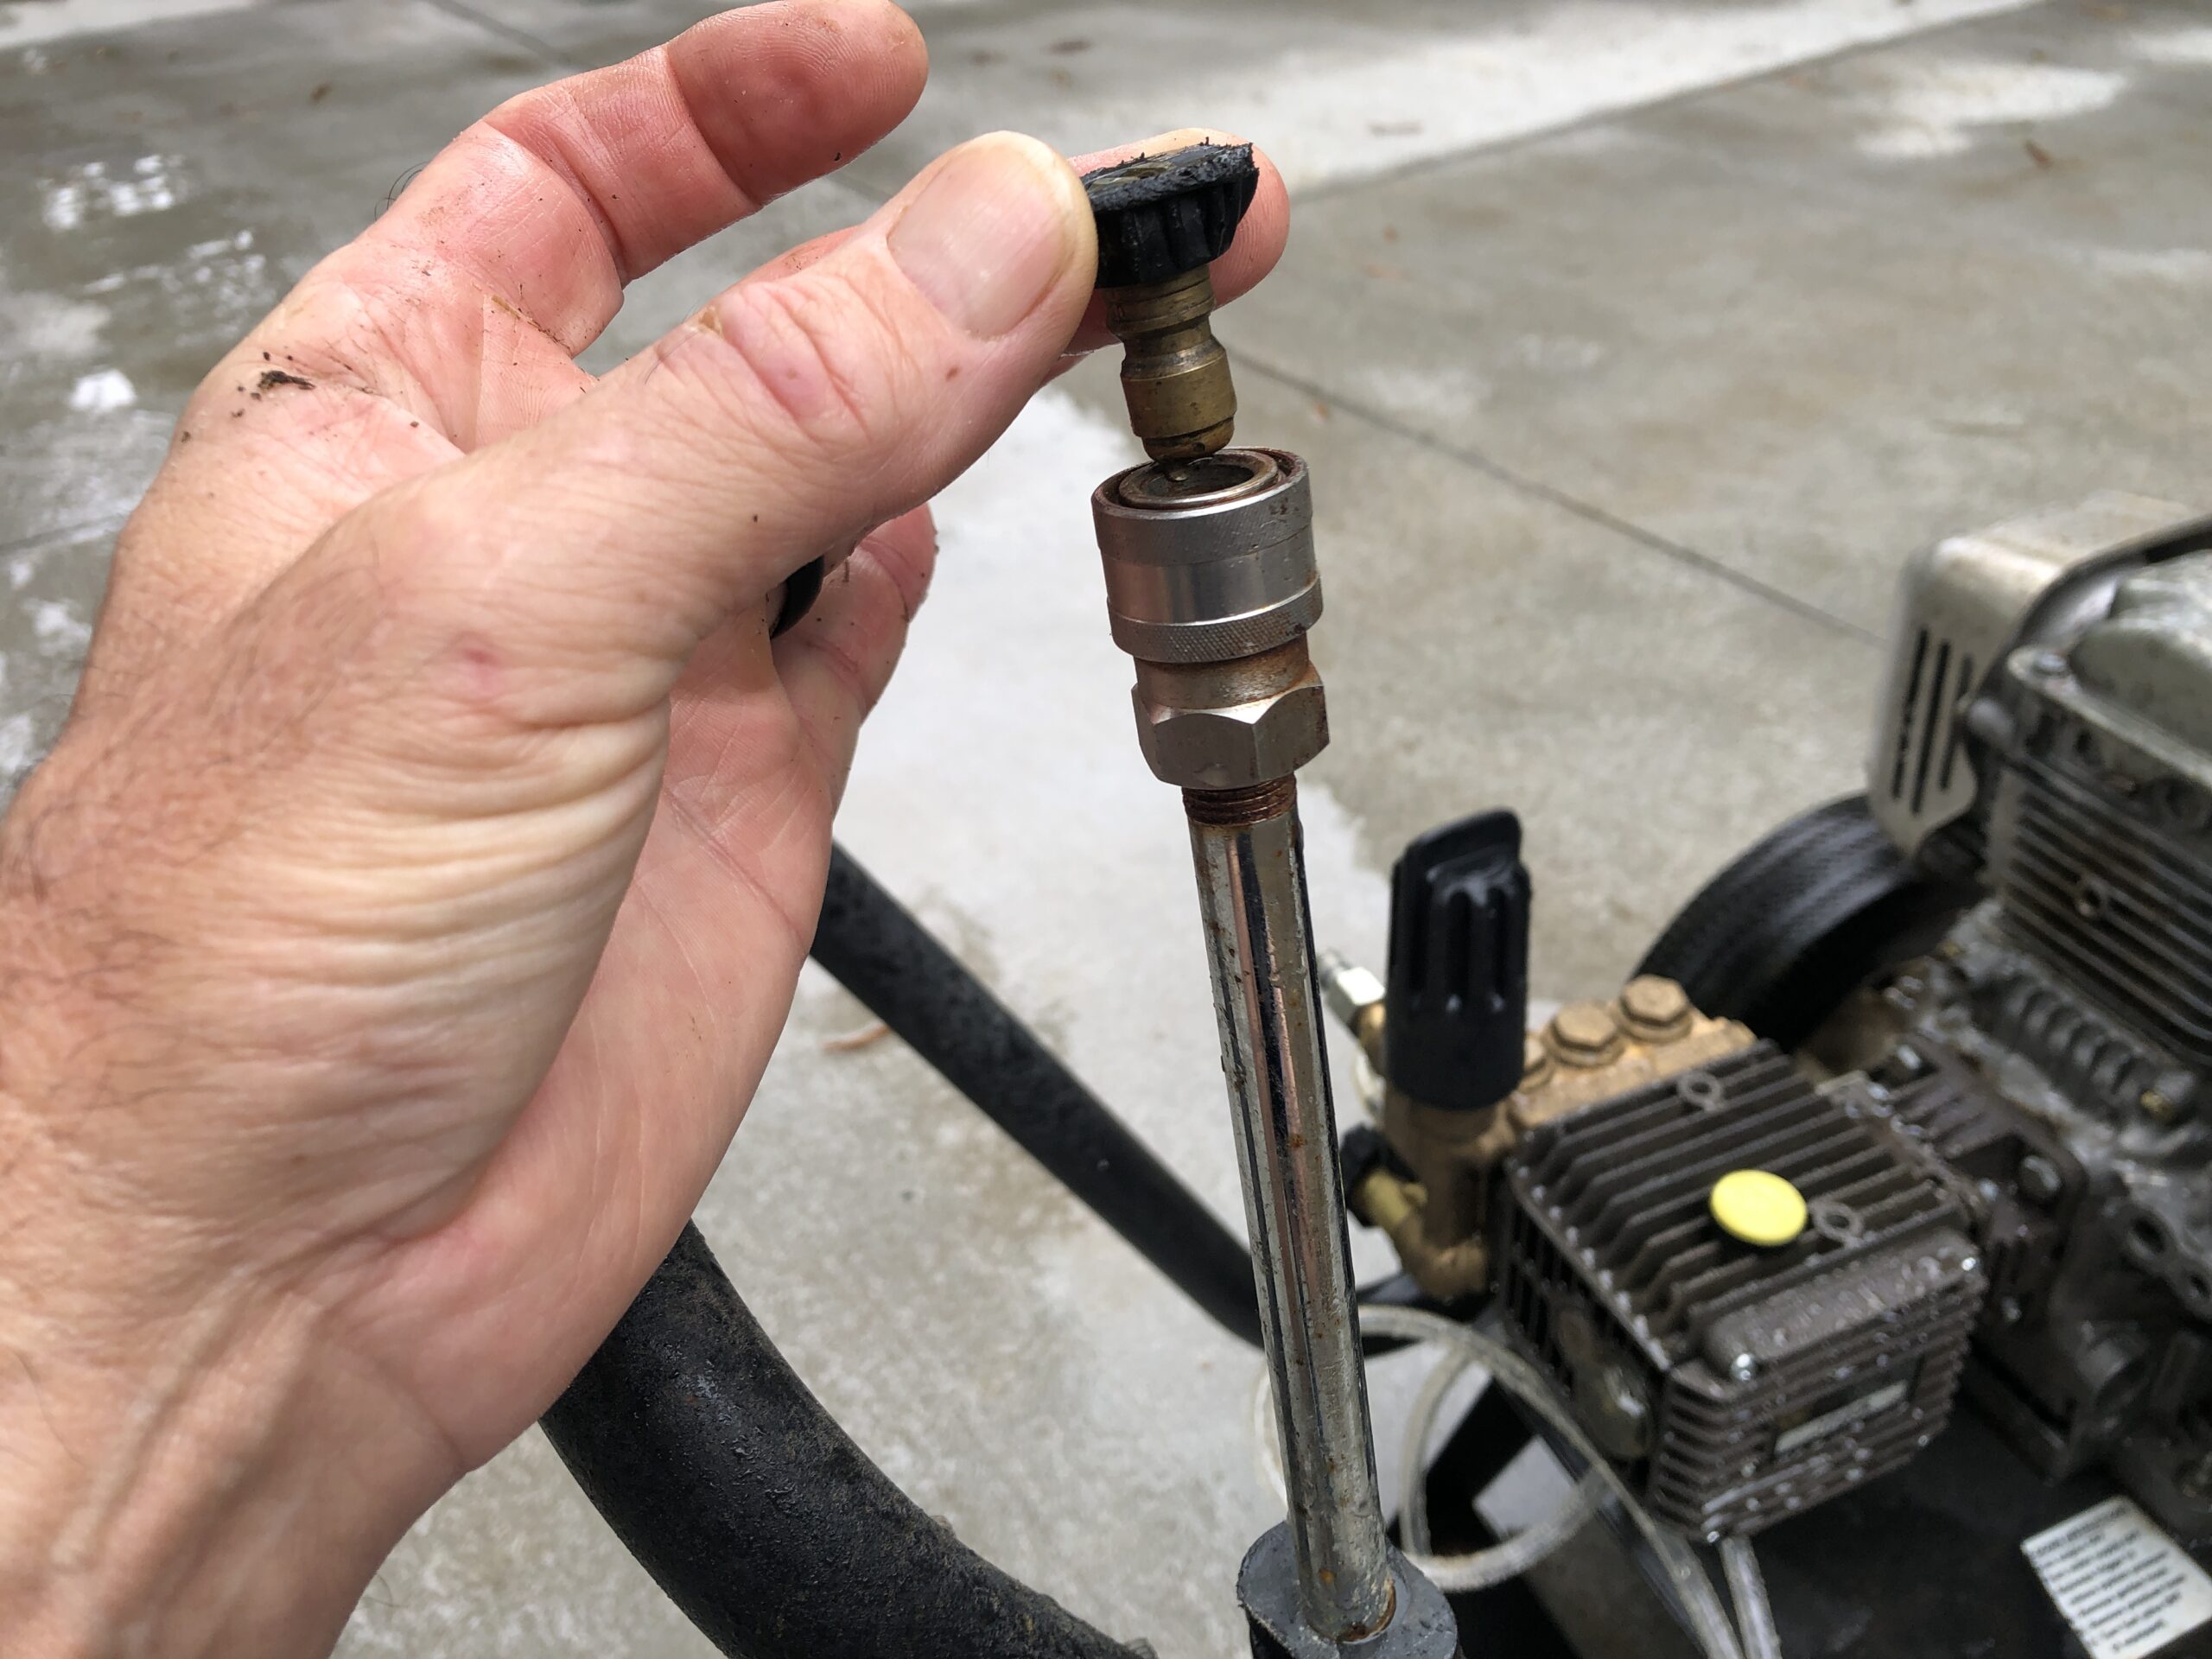
 To begin pulling soap through your pressure washer, all you do is change the pressure washer’s nozzle to the black “soap” tip. Next, drop the downstream hose into your soap mix and begin applying the cleaner to your home using your pressure washer. The soap may take a minute to travel the length of hose you’re using so be patient.

Let the mix dwell for 20-30 minutes and then rinse it clean. Of course, that is if you have a single-story home. This is a pressure washer capability problem. Many consumer level pressure washers don’t have enough power to reach the second story gable ends. You may have to purchase a professional soap shooter tip to reach these heights.

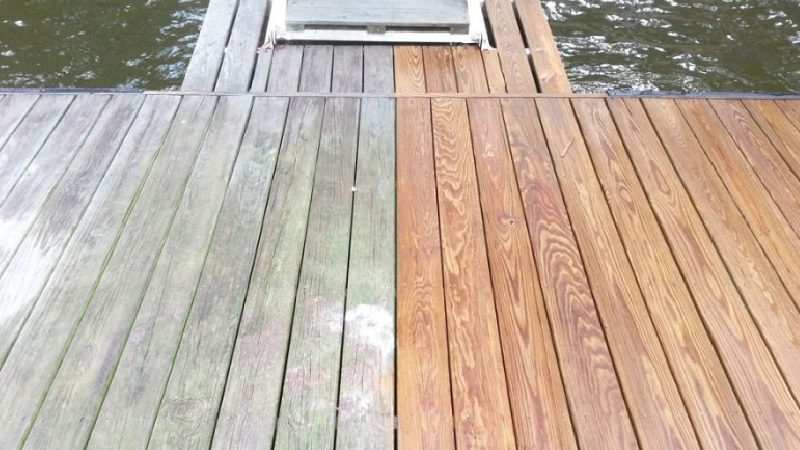
Another common problem I encounter is customers using high-pressure to clean their wood decks.

 Here’s my fifth pressure washing tip:

When you pressure wash a house, never use high-pressure on your wood decks or fences. Many consumer level pressure washers can produce up to 3000 PSI or pounds per square inch of pressure. This is not only dangerous to a person but can rip into the wood’s fiber shortening its life.

Professionals always use cleaners to do the heavy lifting for them. I use oxygenated cleaners and surfactant mix on wood. It’s works great to remove mold, mildew, and algae growth.

You may have read that Sodium Hypochlorite also works on to clean wood. This is true, it does remove mold, mildew, and algae but there’s a downside. Deck cleaners containing bleach harm the woods lignin which is the organic substance that binds the cells, fibers, and vessels of the wood.

Pressure washing Professional always use a two-step process when cleaning wood. After rinsing the wood surface clean, apply a wood brightener to restore the wood back to it’s natural color.

Here’s how you can do it yourself:

Applying wood restoration cleaners is a little different than washing your home. All you need is a quality pump-up sprayer. Follow the directions on the wood cleaner you purchase for the correct dilution mix and application methods. WARNING: Oxygenated cleaners will produce oxygen increasing the pressure in your sprayer so purchase one with a pressure relieve valve.

Add the cleaner to the pump-up sprayer and pump it up. Spray the entire wood surface and let dwell as directed by the cleaning agent’s directions.

After the oxygenated cleaners have done their work, you can rinse the surface with a pressure washer using a low-pressure tip or simply increasing the distance between the nozzle and the surface you’re rinsing.

Applying a wood brightener is usually done exactly like the cleaner but read the directions on the product you purchase to make sure. Lastly, admire the new beauty you’ve uncovered through all your hard work

Lastly, if you’d like Neptune Clean to clean your house for you, click this link to get an instant quote.

Bill Seith

Owner of Neptune Clean LLC

The Ultimate Guide to Pressure Wash a House

It’s almost time to open the windows and let in some fresh air! But before you do, it might be good to clean off your house first. If you live in an area with a hot and humid climate, like here on the Virginia coast, you probably want to pressure wash your house before summer (but fall and winter too!) to remove all the pollen, dirt, and other gunk that has accumulated on your siding over the course of the year. Read on for the ultimate guide to pressure washing your house yourself!

Prep Work

Before you pressure wash a house, it’s important to remove all lawn furniture, and other items that may be in front of or around your home. It’s also crucial that any plants surrounding your home have been removed so they aren’t damaged by soap splatter. If you have cement steps or a porch on your home, those can be cleaned as well.

Safety First

When it comes to how to pressure wash a house, there are some things you want to do safely. If you’re planning on using a pressure washer, ensure you read and understand the manufacturer’s instructions for safe operation. Always turn off and unplug any items outside your home to avoid damage. And make sure everyone else is aware of these safety rules as well. Put up appropriate warning signs if needed so others know where not to walk or stand when you’re pressure washing your house.

Determine Surface Type

If you pressure wash a house, you need to know what type of surface you’re dealing with before getting started. Many home sidings are made from cedar shake, vinyl siding, brick, or a cement composite like Hardie Plank just to name a few. The wrong cleaning solution could lead to damage especially on wood sided homes. If your house is sided with cedar shake, I suggest leaving that to the professionals as the wrong cleaner or too much pressure can damage the fibers of the wood.

Determine Amount of Soap Used

Before pressure washing, it’s important to calculate how much soap you’ll need. Most big-box home stores sell a pre-mixed house wash that can be applied through your pressure washer downstream injector. All you do is apply the soap to your siding, let it dwell the recommended amount of time. The soap does all the work, so you don’t have to use pressure. Too much pressure can force water into places you don’t want it to go.

Rinse Away the Grime

Now that the soap has had time to do it’s thing, you can simply rinse your home clean. Again, be sure to use a large orifice nozzle which reduces the PSI of your pressure washer to under 300 PSI. This will reduce the chances of forcing water under your siding causing potential moisture damage when you pressure wash a house.

Know When to pressure Wash A House Again

You’ll be able to tell if your house needs another power washing after a year or so. Power washing can remove tough stains, but it isn’t magical—it won’t remove truly stubborn stuff like chewing gum, asphalt, or organic stains like torpedo spores.